A steel dome structure design is not only about creating an impressive curved roof. It is an engineering process that controls how a dome building transfers loads, resists wind, maintains stability, supports cladding, and remains practical to fabricate and install. Dome buildings can look simple from the outside, but their structural behavior depends on geometry, connection logic, support conditions, fabrication accuracy, and erection planning.
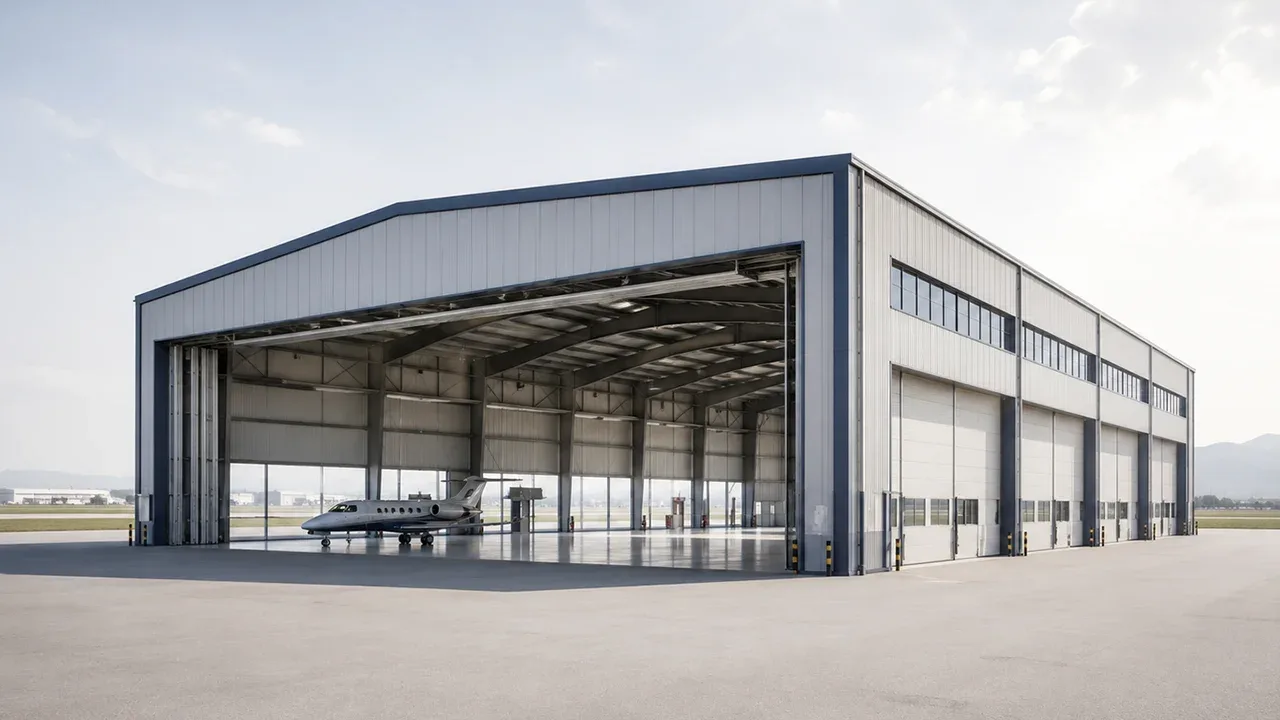
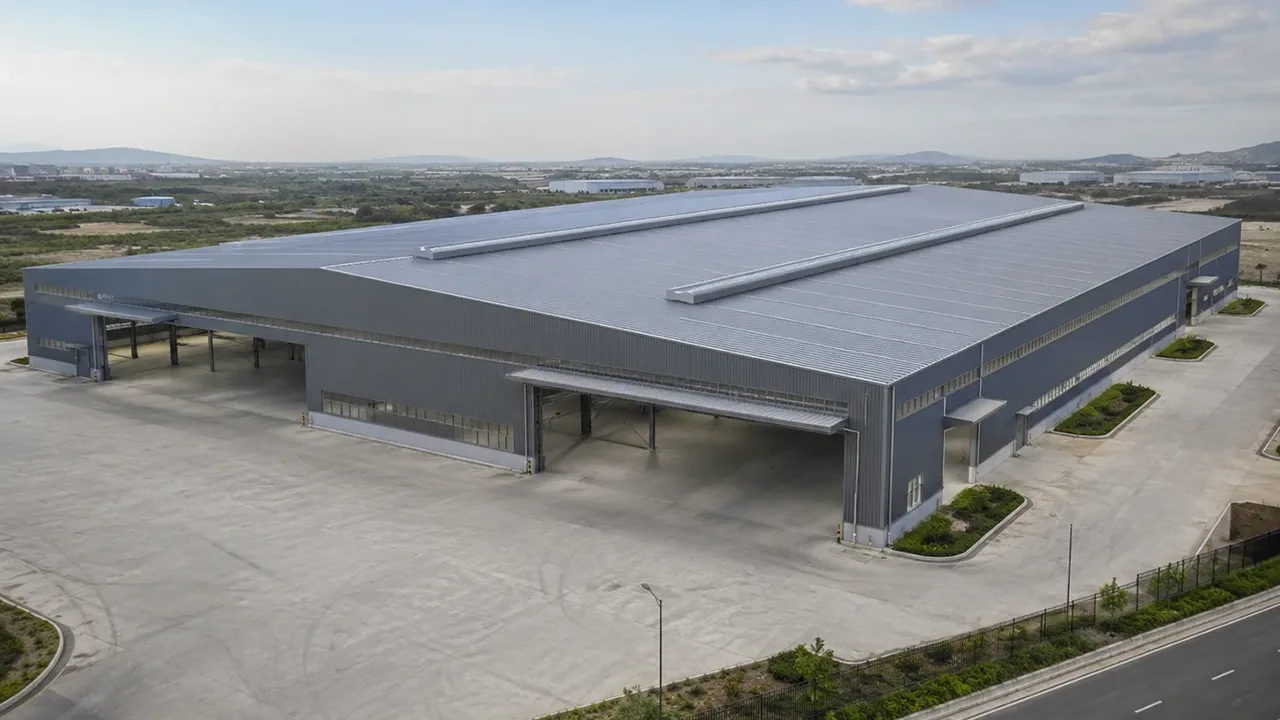
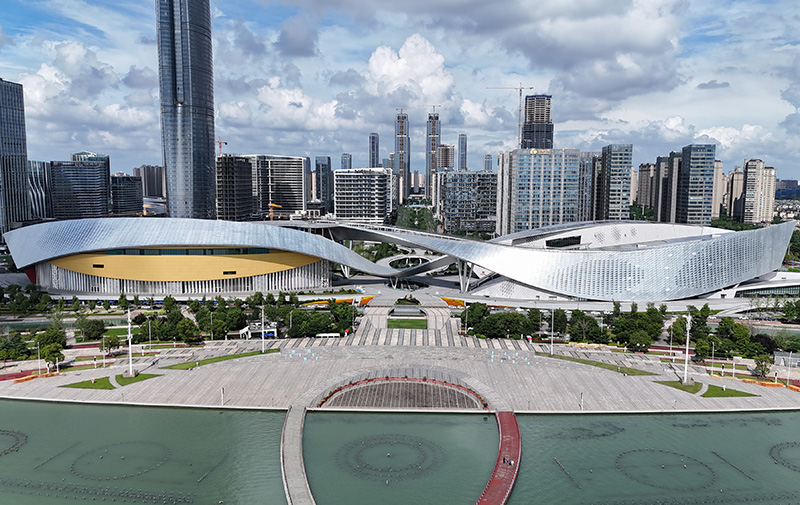
Steel domes are commonly used for stadiums, exhibition halls, sports arenas, storage domes, industrial covers, public buildings, transport facilities, and architectural landmark projects. These buildings often need large open interiors without too many internal columns. A dome shape can help cover a wide area efficiently, but only when the structure is planned as a complete system rather than a visual shell.
The main challenge is that dome structures do not behave like ordinary flat roofs. Loads do not move in one straight direction. They move through radial members, ring members, nodes, perimeter supports, and sometimes three-dimensional space frame patterns. If the load path is clear, the dome can be stable, efficient, and durable. If the load path is poorly coordinated, the project may face excessive movement, difficult fabrication, connection clashes, drainage problems, or installation delays.
What Is Steel Dome Structure Design?
Steel dome structure design is the engineering process used to develop a curved steel roof or building system that can safely support loads and remain stable during fabrication, transportation, erection, and long-term use. It includes structural geometry, member sizing, connection detailing, support design, cladding coordination, drainage planning, corrosion protection, and maintenance access.
A dome may be self-supporting, supported by columns, connected to a perimeter ring beam, or integrated with a larger steel frame. Some domes use ribbed steel members. Others use geodesic patterns, grid shells, or space frame systems. The correct solution depends on the span, architectural intent, load requirements, fabrication method, and site installation conditions.
More Than a Curved Roof Form
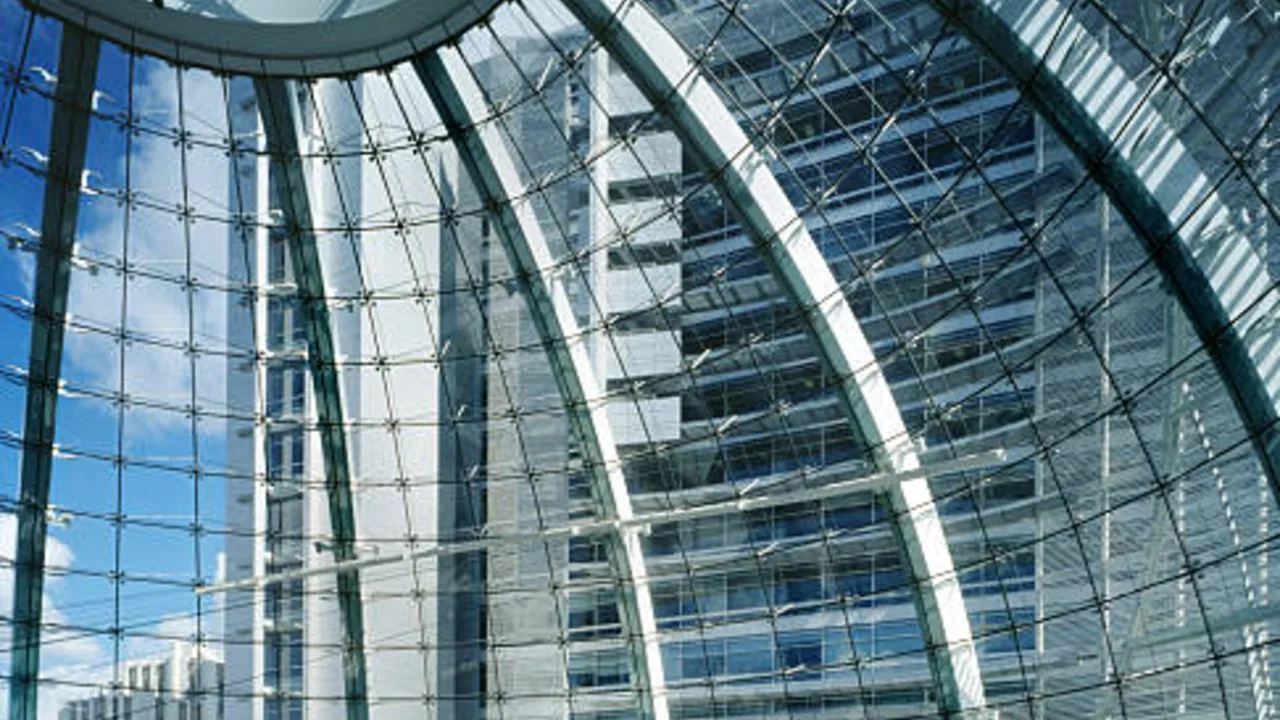
The visible dome shape is only one part of the design. A stable dome depends on how forces are distributed through the structure. Two domes may look similar from a distance but behave very differently if their member layout, support ring, node design, or cladding system is different.
For example, a shallow dome can create strong horizontal forces at the perimeter. A taller dome may distribute loads differently but affect the building height and interior volume. A ribbed dome may provide a clear structural rhythm, while a space frame dome may spread forces in three dimensions. These decisions affect steel weight, connection quantity, fabrication complexity, installation sequence, and final cost.
A strong design therefore begins with engineering logic, not only architectural appearance. The question is not simply, “What dome shape looks good?” The better question is, “How will this dome shape carry load, remain stable, drain water, connect to its supports, and be built accurately?”
How Steel Domes Transfer Loads
In a dome, loads usually move through a combination of radial and circumferential force paths. Gravity loads from steel members, roof panels, insulation, suspended services, and maintenance access move downward through the dome frame. Wind loads may create pressure on one side, suction on another side, and uplift in roof zones. Snow or rain loads may create uneven loading depending on climate, roof shape, drainage, and surface behavior.
Radial members often carry forces from the crown of the dome toward the perimeter. Ring members help control circumferential forces and stabilize the overall geometry. In some dome types, compression and tension forces develop around the perimeter ring. The support system must be able to receive these forces without excessive movement.
This is why the support ring, ring beam, base connections, and foundation interface are not minor details. If the perimeter cannot resist the forces coming from the dome, the roof may spread, move, crack surrounding construction, or create connection stress. A dome works best when the upper structure and lower support system are designed together.
Where Steel Dome Structures Are Commonly Used
Steel dome structures are selected when a project needs a wide covered area, a distinctive architectural form, or an efficient large-span enclosure. Common applications include stadium roofs, arenas, sports halls, exhibition centers, transport terminals, bulk storage domes, public halls, industrial storage buildings, and special architectural buildings.
In stadiums and arenas, dome structures help create large covered spaces while keeping sightlines open. In storage domes, the structure may need to enclose large volumes with minimal internal obstruction. In public buildings, the dome may become part of the architectural identity. In industrial projects, the dome may be chosen for large coverage, weather protection, or material storage.
Each use case creates different design priorities. A stadium dome may focus on span, acoustics, lighting, and public safety. A storage dome may focus on corrosion protection, volume, ventilation, and maintenance access. An exhibition hall may require architectural appearance, interior clearance, suspended services, and flexible use. Good design begins by understanding the real function of the building.
Why Geometry Is the Core of Steel Dome Stability
Geometry is one of the most important factors in dome performance. The radius, rise, span, member spacing, curvature, and support layout all influence how forces move through the system. A dome that looks elegant but has poor structural geometry may require heavier members, complicated connections, or excessive reinforcement.
Dome Radius, Span, and Height
The span determines how far the dome must cover. The rise determines how tall the dome is compared with its span. Together, these factors affect stiffness, internal force distribution, usable interior volume, wind behavior, and installation planning.
A shallow dome can create a low-profile appearance and may reduce building height. However, shallow geometry can increase horizontal thrust, make deflection control more demanding, and create drainage challenges if water movement is not properly planned. A higher dome may improve structural action in some cases and create more interior volume, but it can also increase cladding area, wind exposure, and erection height.
The best ratio between span and rise depends on building function. A sports facility may need clear interior height. A storage dome may need maximum internal volume. A public building may need a specific architectural silhouette. An industrial cover may need practical drainage and simple fabrication. The geometry should support these needs instead of being chosen only for appearance.
Spherical, Geodesic, Ribbed, and Space Frame Dome Forms
Different dome forms create different structural and construction behavior. A spherical dome follows a smooth curved surface and may be used when the architectural form is important. A geodesic dome uses a network of triangular elements, often creating efficient distribution of forces and repeated patterns. A ribbed dome uses main ribs running from crown to perimeter, usually combined with ring members and secondary framing. A space frame dome distributes loads through a three-dimensional grid of members and nodes.
| Dome Form | Typical Strength | Main Design Concern |
|---|---|---|
| Spherical dome | Smooth architectural form and clear roof geometry | Panel layout, drainage, and curved member control |
| Geodesic dome | Triangular stability and repeated load paths | Node accuracy and cladding coordination |
| Ribbed dome | Clear main load path from crown to perimeter | Ring member design and rib spacing |
| Space frame dome | Three-dimensional load distribution | Node complexity and erection sequence |
| Grid shell dome | Lightweight visual expression and flexible geometry | Member buckling, connection detailing, and stiffness |
No dome type is automatically best. A geodesic pattern may be efficient for one project but too complex for another. A ribbed dome may be easier to understand structurally but may require stronger secondary support for cladding. A space frame dome may provide excellent three-dimensional stiffness but increase node count and installation coordination. The correct choice depends on span, load demand, architectural intent, fabrication capability, transport limits, and site access.
Symmetry and Structural Balance
Dome structures often perform best when loads and support conditions are balanced. Symmetrical geometry allows forces to distribute more evenly through radial and ring members. When large openings, uneven equipment loads, partial supports, or irregular cladding zones are added, the force pattern can become more complicated.
This does not mean every dome must be perfectly symmetrical. Many modern buildings require skylights, smoke vents, entry zones, equipment platforms, ventilation openings, or architectural cutouts. However, these interruptions must be engineered carefully. Openings may require local reinforcement. Heavy equipment may require dedicated support frames. Asymmetrical loads may require stronger members or additional bracing.
A stable dome does not depend only on the shape. It depends on how the shape behaves under real loading conditions. That is why steel dome structure design must review both the ideal geometry and the practical changes required by building use.
Main Structural Components in a Steel Dome System
A steel dome system includes more than curved main members. It usually contains radial members, ring members, crown connections, perimeter supports, nodes, bolts, plates, purlins, secondary members, cladding supports, and bracing. These parts must work together as one structural system.
Radial Members and Ring Members
Radial members usually extend from the upper zone of the dome toward the perimeter. They help carry loads along the dome surface and transfer forces toward the supports. Their spacing affects structural efficiency, cladding support, fabrication quantity, and installation rhythm.
Ring members run around the dome in circular or polygonal paths. They help control circumferential forces, stabilize radial members, and maintain the dome shape. In some designs, ring members also support purlins, roof panels, skylights, maintenance access, or service attachments.
The relationship between radial and ring members is important. If radial spacing is too wide, cladding support may become difficult. If ring spacing is too close, fabrication and connection quantity may increase. If the ring system is too weak, the dome may lose stiffness or transfer excessive forces to the supports. A practical design balances member spacing with load transfer, cladding requirements, fabrication efficiency, and installation sequence.
Crown Ring and Compression/Tension Rings
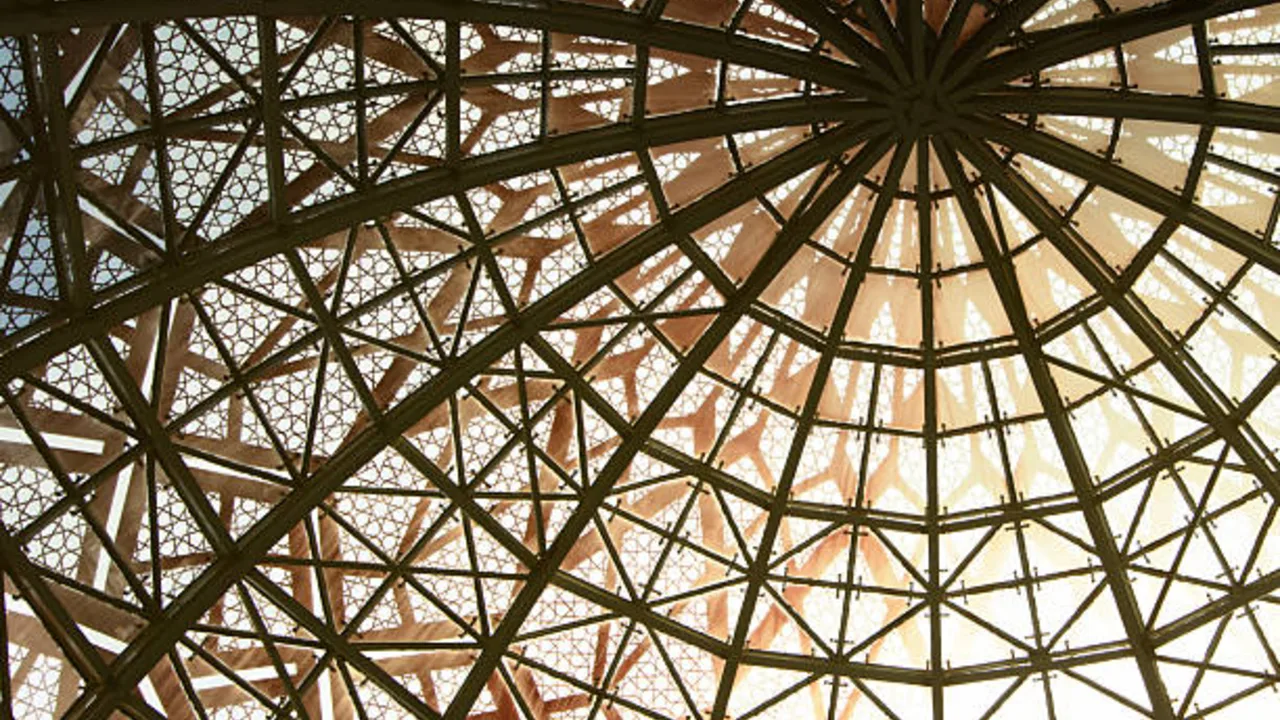
The crown is the upper zone of the dome. In many dome systems, several members meet near the top, creating a critical connection area. A crown ring may be used to organize these connections, distribute forces, and provide a clear assembly point. If the crown detail is poorly planned, fabrication and erection can become difficult because many members may meet at tight angles.
At the perimeter, the dome may require a compression ring, tension ring, or ring beam depending on the structural form and force behavior. This ring helps collect forces from the dome and transfer them into columns, walls, or foundations. It can be made from steel, reinforced concrete, or a combined system.
The perimeter ring is often one of the most important stability components. If it is not stiff enough, the dome may spread or deform. If its connection to the supports is inaccurate, erection may become difficult. The dome frame and the perimeter support should therefore be designed as a coordinated system.
Nodes, Bolts, Plates, and Welded Connections
Connections are especially important in dome structures because members often meet at different angles. A simple flat roof frame may have repetitive beam-column joints, but a dome can include many node angles, curved alignments, and three-dimensional connection conditions.
Nodes may use welded plates, bolted gussets, ball nodes, cast nodes, or custom fabricated connectors depending on the dome type. The connection system must allow forces to move through the members without creating unexpected eccentricity, excessive stress concentration, or difficult site assembly.
Good connection design considers bolt access, weld quality, plate thickness, fabrication tolerance, member angle, coating repair, inspection access, and erection sequence. A strong member with a weak or impractical node detail can still create problems. In many dome projects, connection design has as much influence on buildability as member sizing.
Purlins, Secondary Members, and Cladding Supports
Secondary members support the building envelope. They may include purlins, girts, panel rails, skylight frames, vent frames, drainage supports, and maintenance walkway supports. These members transfer cladding and environmental loads into the main dome structure.
The cladding support system must match the curved geometry. Roof panels may need special fixing layouts, curved seams, segmented panels, or flexible waterproofing details. Purlins and secondary members must also coordinate with openings, insulation thickness, gutters, flashings, and access routes.
If secondary framing is treated as an afterthought, problems can appear during installation. Panels may not align with the structure. Openings may clash with members. Drainage paths may become awkward. Good dome design connects the primary structure and the envelope strategy from the beginning.
Key Engineering Loads in Steel Dome Structure Design
A dome must be designed around real loads, not only ideal geometry. These loads include the weight of the structure, roof covering, environmental pressure, maintenance access, and future equipment. The larger the dome, the more important it becomes to understand how each load enters and moves through the system.
Dead Load and Roof Covering Load
Dead load includes the weight of steel members, nodes, bolts, plates, purlins, cladding, insulation, waterproofing layers, skylights, ceilings, and permanent service supports. In a steel dome, dead load is usually distributed over a curved surface, but it still needs a clear path into the main structure and supports.
Roof covering load should not be underestimated. Metal panels, insulated panels, membranes, glass areas, skylight frames, and maintenance walkways can all influence member design. If the cladding system changes after the steel frame is designed, the project may need member revisions, connection changes, or additional secondary framing.
Wind Load and Uplift
Wind is often one of the most critical loads for large steel domes. Curved roofs can experience complex pressure and suction zones. Wind may push against one side of the dome, lift roof areas, create local suction near edges, and generate lateral movement in the supporting system.
Because of the curved surface, wind behavior should be reviewed carefully for the actual dome shape and project location. Dome height, surrounding buildings, site exposure, roof openings, cladding type, and local wind code all matter. For important public buildings or very large spans, additional wind review may be required.
Uplift forces also affect cladding fixings, purlin connections, node design, and support anchorage. A dome must resist not only downward gravity loads but also upward and lateral forces created by wind.
Snow, Rain, and Drainage Load
Snow may not apply to every project, but where it does, it can create major design demand. Snow may accumulate unevenly depending on dome shape, wind direction, nearby roof levels, and surface conditions. A dome design for a cold climate must review both uniform and drifted snow conditions.
Rain load is also important. A curved roof still needs planned drainage. Water must move toward controlled collection points, gutters, valleys, downpipes, or drainage channels. If drainage is poor, ponding can increase load and create waterproofing risk. Shallow dome zones or complex cladding intersections may require special attention.
Drainage planning should be connected to structural geometry. A dome that is structurally efficient but difficult to drain can create long-term maintenance problems.
Maintenance and Future Equipment Loads
Maintenance loads include workers, access platforms, inspection routes, safety anchors, cleaning equipment, and repair zones. Future equipment loads may include solar panels, lighting rigs, HVAC units, exhaust vents, communication devices, or suspended systems.
These loads should be discussed before fabrication. Adding equipment after the dome structure is finalized can require reinforcement, new brackets, additional purlins, stronger connections, or local redesign. Early planning helps avoid expensive changes and keeps the dome system easier to maintain over time.
Support Conditions and Foundation Interface
A dome structure does not end at the curved roof frame. Its stability depends heavily on how forces reach the perimeter supports and foundations. Even when the steel dome itself is well designed, poor support coordination can create movement, cracking, misalignment, or difficult installation.
How Dome Forces Reach the Supports
Dome forces usually move toward the perimeter through radial members, ring members, and support nodes. These forces may include vertical reactions from gravity loads, horizontal thrust from dome action, uplift from wind, and lateral forces from environmental loading. The support system must be able to receive these forces without excessive deformation.
Depending on the building type, the dome may connect to steel columns, reinforced concrete walls, a steel ring beam, a concrete ring beam, or a hybrid support system. Each support condition changes how the dome behaves. A flexible support may allow more movement. A stiff support may attract higher forces. A good design reviews both the dome frame and the supporting structure together.
Perimeter Ring Beam Design
The perimeter ring beam is one of the most important parts of many dome buildings. It collects forces from the dome and distributes them into the supporting structure. If the ring beam is weak, poorly connected, or not aligned with the dome geometry, the entire structure can lose efficiency.
A steel ring beam may be preferred when the dome connects to a steel-framed building. A concrete ring beam may be used when the dome sits on concrete walls or a circular foundation system. In some projects, both steel and concrete elements work together. The key is that the ring beam must be designed for the real force pattern of the dome, not treated as a simple architectural edge.
Anchor Bolts, Base Plates, and Tolerances
Circular and curved structures are sensitive to tolerance errors. A small anchor bolt misalignment at one support point can affect multiple members around the dome. Base plate position, bolt layout, grout thickness, support level, and site survey accuracy all need careful control.
Before fabrication, the steel supplier and civil contractor should coordinate anchor bolt templates, support elevations, ring beam dimensions, and inspection procedures. During installation, the support layout should be checked before major dome segments are lifted. Correcting tolerance errors after the dome is partially erected can be slow, expensive, and risky.
Fabrication Factors That Affect Dome Accuracy
A successful steel dome structure design depends on accurate fabrication. Dome members often meet at different angles, and many components may look similar but fit only in specific positions. Without precise cutting, marking, inspection, and packaging, site installation can become difficult.
Member Cutting and Curved Geometry Control
Some dome systems use repeated member lengths, while others require many custom-cut elements. Geodesic domes may use repeated triangular patterns, but still require accurate node angles. Ribbed domes may use curved or segmented ribs. Space frame domes may include many short members connected at complex node positions.
Member length, cutting angle, hole position, curvature, and identification marks must match the approved shop drawings. If members are only slightly inaccurate, the error may multiply around the dome. This can cause bolt holes to misalign, rings to distort, or panels to lose their intended layout.
Node Fabrication and Trial Assembly
Nodes are often the most complex fabrication points in a dome structure. Several members may meet at one node from different directions. If the node is fabricated incorrectly, many connected members may be affected.
For complex domes, trial assembly can reduce site risk. This may include assembling a representative dome segment, testing node fit-up, checking bolt alignment, or verifying the crown and ring details before shipment. Trial assembly adds workshop effort, but it can prevent much larger delays during erection.
Surface Treatment and Corrosion Protection
Steel domes may be used in coastal zones, humid environments, industrial areas, public buildings, storage facilities, or exposed outdoor conditions. Each environment requires a suitable corrosion protection strategy. Paint systems, galvanizing, primer selection, coating thickness, and repair methods should be chosen based on exposure conditions and maintenance access.
Corrosion protection should be planned before fabrication is complete. Weld zones, bolt contact surfaces, concealed node areas, and transport handling points need attention. Poor coating access around complex dome nodes can create long-term maintenance problems if not addressed early.
Packaging and Member Identification
A dome may include hundreds or thousands of members, bolts, plates, nodes, brackets, and secondary components. Many pieces may look similar but belong to different zones. Clear labeling is therefore essential.
Packaging should follow erection sequence whenever possible. Crown components, ring members, radial members, node sets, bolts, secondary framing, and cladding supports should be grouped logically. Good identification reduces site confusion, avoids unnecessary material handling, and helps the installation team maintain progress.
Installation and Erection Planning for Steel Dome Buildings
Installation planning should influence the dome design from the beginning. A dome that is efficient in calculation may still be difficult to build if the site has limited crane access, insufficient laydown space, difficult lifting geometry, or unclear temporary support requirements.
Segmental Assembly vs Full Dome Assembly
Some dome projects are assembled member by member in the air. Others use ground-assembled segments lifted into position. Large dome sections may be preassembled on the ground to reduce high-altitude work, but this requires enough site space, lifting capacity, and temporary support planning.
Member-by-member erection may reduce lifting weight but increase work at height. Segmental assembly may improve quality control but require stronger cranes and careful rigging. The best method depends on dome span, site access, member weight, safety requirements, and installation schedule.
Temporary Support and Stability During Erection
A dome may not be stable until enough rings, radial members, bracing, and support connections are completed. Temporary towers, bracing cables, scaffolding, staged tightening, or temporary frames may be required during erection.
Temporary support should be designed, not improvised. The installation team should understand which members stabilize the dome at each stage, when bolts can be fully tightened, when temporary supports can be removed, and how wind affects partially completed conditions. Stability during erection is just as important as stability after completion.
Crane Planning and Site Access
Crane planning affects both cost and safety. The erection plan should review lifting radius, lifting weight, working height, ground condition, truck access, storage area, and obstacle clearance. For dome buildings, lifting angles can be complex because segments may not be flat or evenly balanced.
If crane access is considered too late, the project may need smaller segments, additional temporary supports, or a changed erection sequence. Good planning connects fabrication size, transport limits, site storage, and crane capacity before production begins.
Connection Fit-Up on Site
Connection fit-up is one of the most common causes of delay in dome projects. Bolt holes must align. Node angles must match. Ring members must close correctly. Support points must match the actual site geometry. If tolerances are not controlled, workers may be forced to modify members in the field.
Field modification should be minimized. Cutting, drilling, or welding at height can reduce quality, slow the project, and damage protective coatings. Accurate fabrication, trial assembly, clear labeling, and support verification help keep site work focused on assembly rather than correction.
Steel Dome Structure Design and Building Envelope Coordination
The steel frame and building envelope must be planned together. A dome roof is not only a structural surface; it is also a weather barrier. Cladding, drainage, insulation, skylights, vents, and waterproofing must match the dome geometry.
Roof Cladding and Panel Layout
Curved geometry affects panel selection and installation. Some dome roofs use metal panels. Others use standing seam systems, insulated panels, membrane systems, glass elements, or custom cladding. Each option has different requirements for support spacing, fixing method, overlap, waterproofing, and movement control.
Panel layout should be reviewed before steel fabrication. If the dome frame spacing does not match the cladding system, the project may face difficult fixing, awkward panel cuts, excessive waste, or leakage risk. A coordinated layout improves both appearance and performance.
Drainage and Waterproofing Details
Dome roofs still need controlled drainage. Water may flow in multiple directions depending on curvature, slope, panel seams, gutters, and openings. Drainage zones should be planned clearly, especially around perimeter edges, valleys, roof penetrations, skylights, and maintenance access points.
Waterproofing details are critical because curved roofs may include many transitions. Flashings, sealants, gutters, downpipes, penetrations, and access hatches must be designed for movement and maintenance. A visually clean dome can still fail in service if drainage and waterproofing are weak.
Skylights, Ventilation, and Service Openings
Openings interrupt the structural rhythm of a dome. Skylights, ventilation units, smoke vents, exhaust openings, access hatches, and service penetrations may require local reinforcement. Their positions should be coordinated before fabrication so that primary members, secondary framing, and cladding supports work together.
Late openings can create expensive changes. Cutting through completed dome framing may require reinforcement, coating repair, and new waterproofing details. Early coordination keeps the structure cleaner and reduces site rework.
Cost-Related Design Decisions in Steel Dome Projects
Cost in a dome project is not controlled by steel tonnage alone. Geometry, node complexity, member repetition, coating system, transportation, lifting method, cladding difficulty, and maintenance access can all affect total cost.
Why the Cheapest Geometry Is Not Always the Best
A dome shape that appears economical in the structural model may become expensive during fabrication or installation. Too many unique members, complex nodes, difficult panel geometry, special transport needs, or heavy lifting requirements can increase total project cost.
Before finalizing geometry, project owners should compare design complexity with the full steel dome construction cost, including fabrication, coating, transport, lifting, cladding, drainage, and maintenance access. A slightly heavier but simpler dome may sometimes be more economical than a lighter system with difficult connections and complicated erection.
Repetition vs Custom Fabrication
Repetition can reduce cost and risk. When members, nodes, panels, and connection details repeat, fabrication becomes easier, inspection becomes faster, and installation becomes more predictable. Geodesic and modular dome systems often benefit from repeated patterns.
Custom fabrication may still be worthwhile when architecture, span, site constraints, or performance requirements demand it. The decision should be intentional. Custom geometry should provide clear value, not simply increase complexity.
Transport and Installation Cost Impact
Large dome segments can reduce site assembly work but may increase transportation and lifting costs. Smaller members can be easier to ship but may increase installation labor and connection quantity. Limited road access, container dimensions, site storage, crane reach, and weather conditions all influence the practical cost of construction.
A good cost review includes workshop fabrication, trial assembly, surface treatment, packaging, shipping, unloading, crane planning, temporary support, site labor, cladding installation, and future maintenance. This broader view helps avoid choosing a design that is cheap in one stage but expensive in another.
Common Mistakes in Steel Dome Structure Design

Many dome problems come from treating structure, architecture, fabrication, and installation as separate tasks. Stable dome buildings require integrated planning from the beginning.
Designing the Dome Shape Before the Load Path
A dome should not be designed only as a visual form. The load path must be clear from the crown to the perimeter and into the foundation. If the shape is selected before the force behavior is understood, the project may need unnecessary reinforcement or complex connection corrections.
Underestimating Connection Complexity
Dome nodes often involve multiple members at different angles. Underestimating connection complexity can lead to bolt conflicts, poor weld access, difficult inspection, coating problems, and slow erection. Connection design should be reviewed together with fabrication and installation teams.
Ignoring Wind Behavior on Curved Roofs
Wind on curved roofs can create complex pressure and suction patterns. If wind behavior is oversimplified, the dome may face cladding uplift, connection stress, support movement, or local instability. Wind load review should match the actual dome shape, height, location, and exposure.
Adding Openings or Equipment Too Late
Skylights, vents, HVAC units, solar panels, lighting rigs, and maintenance platforms should not be added after the structural system is finalized. Late additions may require reinforcement, new secondary framing, stronger connections, and waterproofing changes.
Treating Fabrication and Installation as Separate Problems
Dome design must be buildable. Member sizes, node details, segment limits, trial assembly, transport route, crane access, temporary support, and site sequence should be considered during design. A dome that cannot be fabricated or erected efficiently is not a good design, even if the structural calculation is acceptable.
How to Evaluate a Steel Dome Structure Design
Before approving a steel dome structure design, project owners and engineers should review the building as a complete system. The following checklist can help identify whether the design is stable, buildable, and maintainable.
- Required span: Confirm the dome span matches the interior function and open-space requirement.
- Dome rise and radius: Review how geometry affects stiffness, interior volume, wind behavior, and drainage.
- Structural form: Compare ribbed dome, geodesic dome, space frame dome, grid shell, and hybrid options.
- Load conditions: Check dead load, wind, rain, snow where applicable, seismic effects, and maintenance loads.
- Support condition: Review columns, walls, ring beams, foundation stiffness, and horizontal force resistance.
- Ring beam design: Confirm the perimeter ring can collect and transfer dome forces safely.
- Node complexity: Review bolt access, weld quality, plate thickness, tolerance, and inspection needs.
- Cladding system: Coordinate panel layout, fixing method, insulation, skylights, and waterproofing.
- Drainage: Confirm water paths, gutters, downpipes, penetrations, and maintenance access.
- Fabrication tolerance: Check member cutting, hole location, node fabrication, and trial assembly requirements.
- Transport route: Review segment size, shipping method, road limits, unloading space, and storage area.
- Crane access: Confirm lifting weights, crane radius, working height, ground condition, and rigging plan.
- Temporary support: Define erection stages, temporary bracing, support towers, and removal sequence.
- Corrosion environment: Select coating, galvanizing, or protection systems based on exposure and maintenance needs.
- Future equipment: Consider solar panels, HVAC, lighting, maintenance platforms, safety anchors, and suspended loads.
This checklist helps prevent the design from being judged only by appearance or steel weight. A good dome must work structurally, practically, and operationally.
Conclusion: Stable Steel Dome Buildings Start with Integrated Design
A steel dome structure design is successful when geometry, load path, support conditions, connection details, fabrication accuracy, envelope coordination, and erection planning work together. A dome is not simply a curved roof. It is a complete structural system that must remain stable during construction and reliable throughout its service life.
The best steel dome is not always the lightest, tallest, or most visually dramatic option. It is the dome that matches the project’s span, function, environment, fabrication capacity, transport route, installation method, and maintenance needs. When these factors are planned from the beginning, a steel dome can provide large-span coverage, strong architectural value, efficient structural performance, and long-term building reliability.