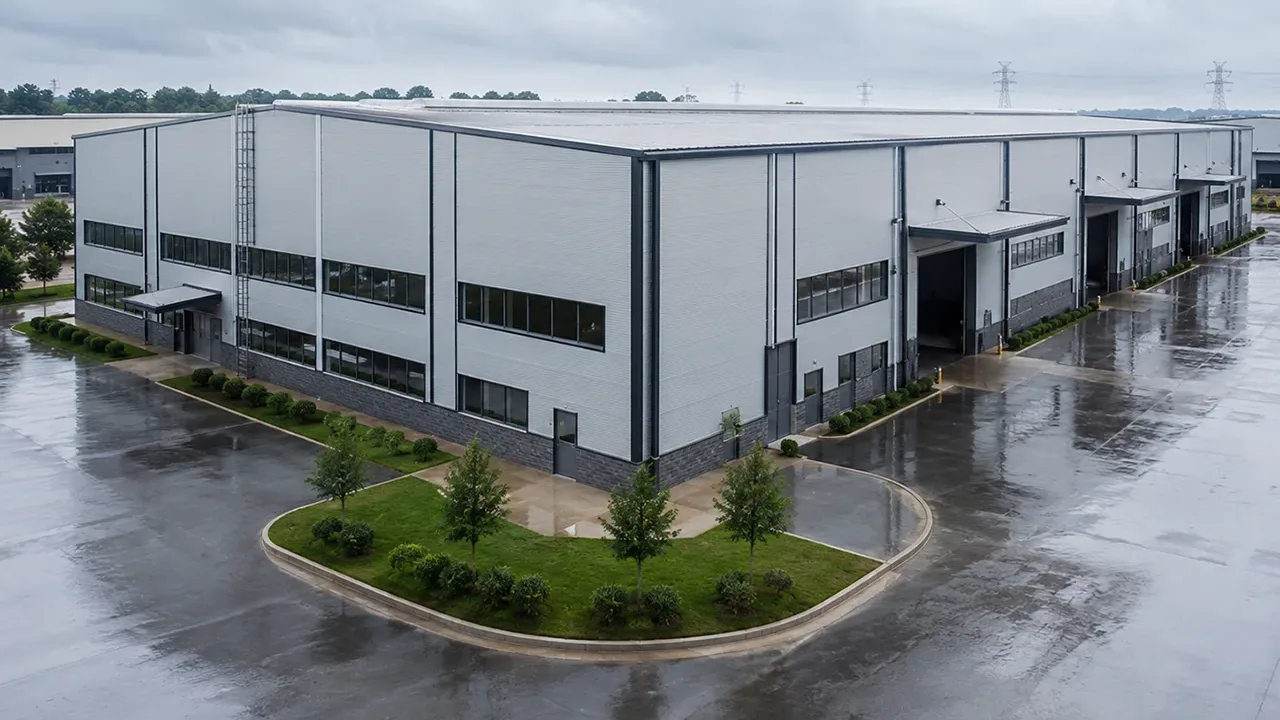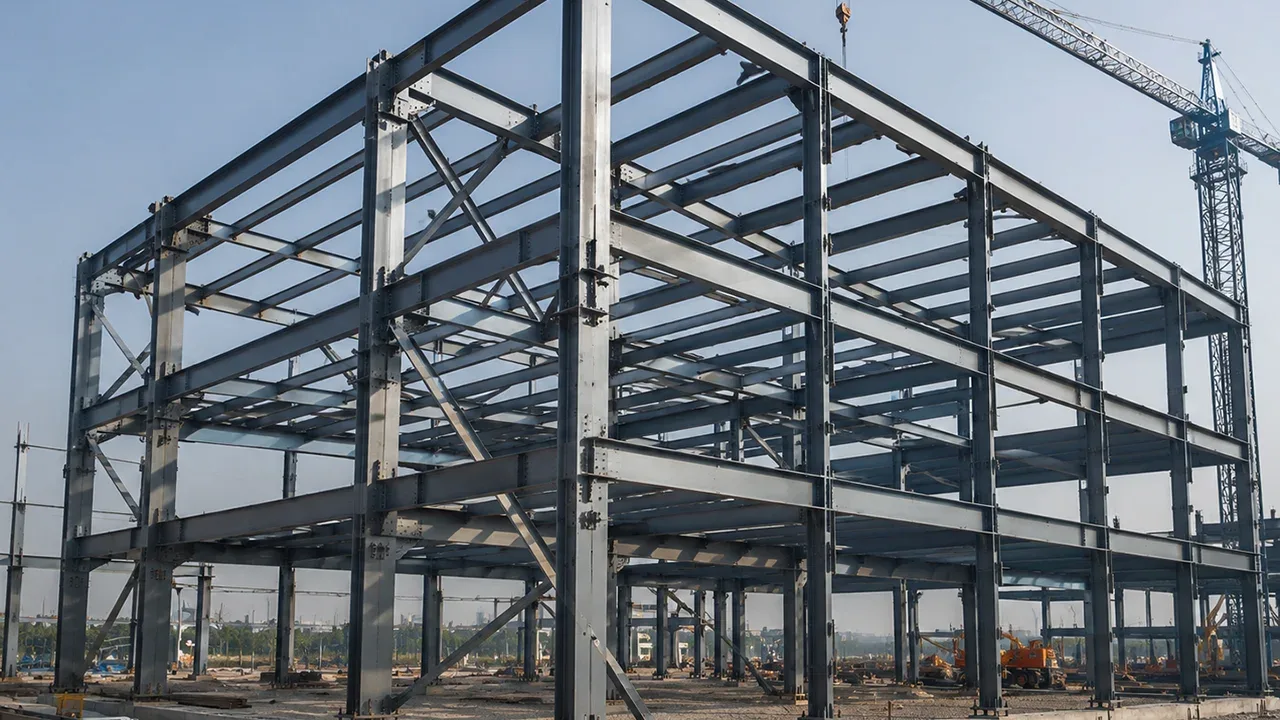
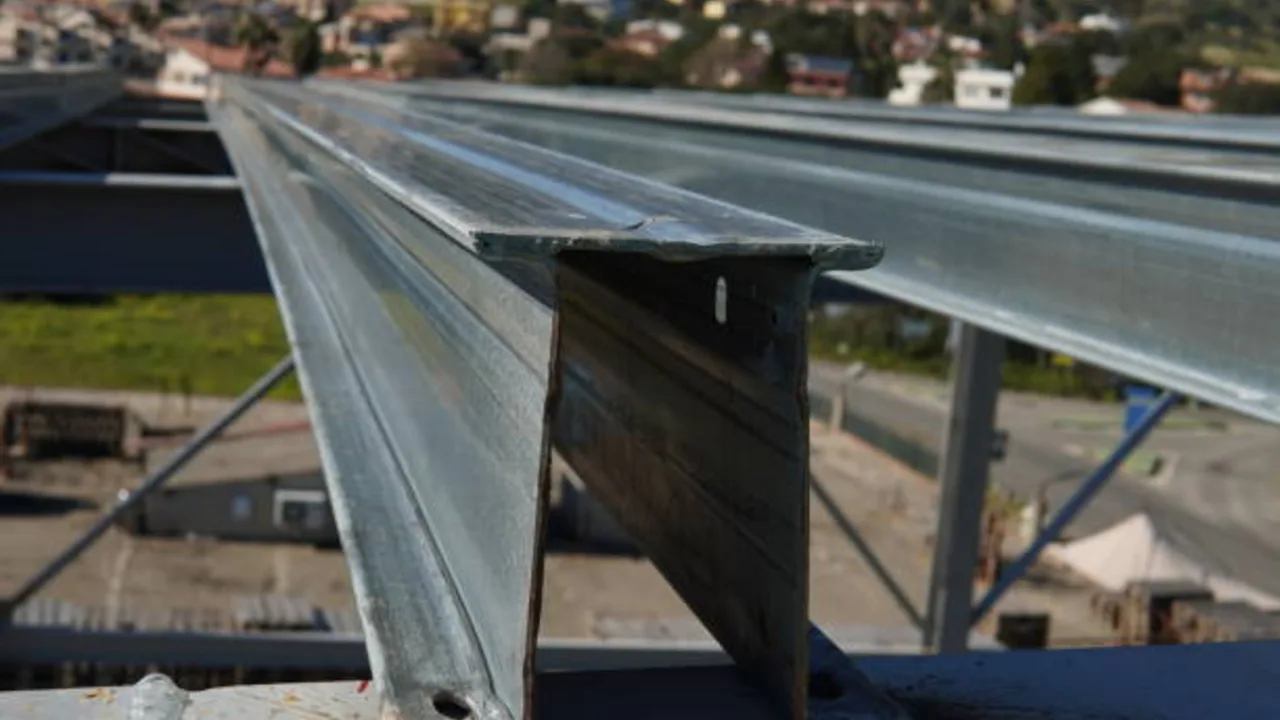
C and Z Purlins for Steel Buildings are important secondary steel members used to support roof and wall cladding in industrial, commercial, agricultural, and prefabricated steel structures. Although they are not usually the main structural frame, they play a major role in how the building performs. A well-designed purlin system helps the roof stay aligned, supports wall panels properly, transfers loads into the main frame, and improves installation efficiency on site.
In a steel building, the main frame may include columns, rafters, trusses, or portal frames. These primary members carry the major structural loads. Purlins and girts sit between them and support the building envelope. Roof sheets, wall panels, insulation, fasteners, gutters, skylights, and some light accessories often depend on correct purlin spacing and proper installation. If the purlin layout is weak, even a strong main frame can face roof leakage, cladding deformation, fastening problems, or poor alignment.
C purlins and Z purlins are both common cold-formed steel profiles. They are lightweight, efficient, easy to transport, and suitable for factory production. However, they are not the same. Their shape, connection behavior, overlap ability, and typical application are different. Choosing the right profile requires more than selecting a standard size from a catalog. The correct choice depends on span, load, bay spacing, roof slope, cladding system, wind uplift, corrosion environment, and erection sequence.
This article explains the uses, size selection logic, installation details, and common mistakes related to C and Z purlins. It also explains why these secondary members are essential for reliable steel building performance.
What Are C and Z Purlins in Steel Buildings?
Purlins are horizontal secondary steel members installed between the main structural frames of a building. In roof systems, they are fixed across rafters, trusses, or portal frames to support roof panels. In wall systems, similar secondary members are often called girts, and they support wall cladding. In practical steel building language, C and Z sections may be used for both roof and wall support depending on the design.
The main function of purlins is to transfer roof or wall loads into the primary frame. These loads may include the self-weight of roof sheets, insulation, wind pressure, wind suction, rain load, snow load where applicable, and maintenance loads. In wall systems, girts must resist wind pressure and suction while keeping wall panels straight and stable.
Purlins are usually made from cold-formed steel. The steel sheet is formed into a C or Z profile through rolling or bending. The result is a lightweight member with efficient strength for its weight. Many purlins are galvanized or painted for corrosion protection, especially when they are used in industrial buildings, warehouses, workshops, agricultural facilities, or humid environments.
In a complete building system, C and Z Purlins help connect the primary frame with the roof and wall envelope. They may not be the most visible part of the structure, but they affect installation speed, cladding accuracy, waterproofing, and long-term maintenance.
Difference Between C Purlins and Z Purlins
C and Z purlins are often discussed together because both are used as secondary steel members. However, their geometry creates different behavior during installation and load transfer. Understanding the difference helps project owners, engineers, and installation teams choose the right member for the right location.
C Purlins
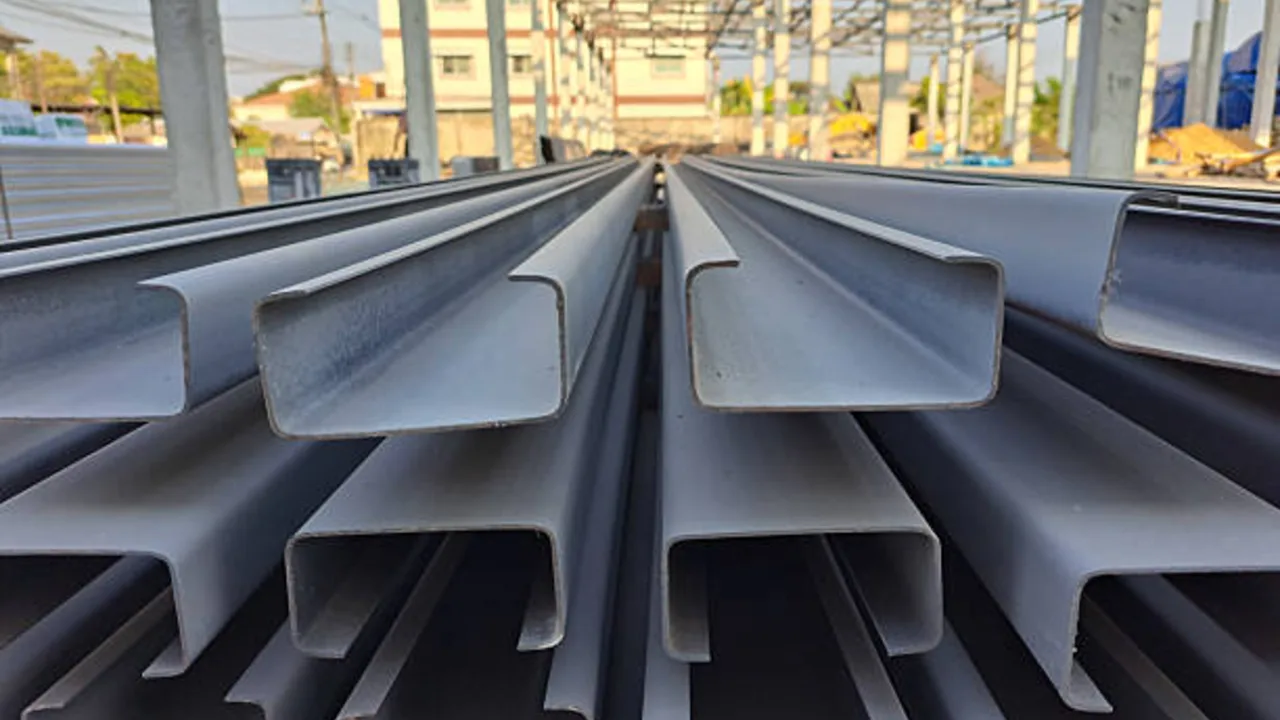
C purlins have a C-shaped cross section. They have a web, two flanges, and usually small lips at the flange edges to improve stiffness. Because of their shape, C purlins are simple to position and install. They are commonly used in wall systems, smaller roof spans, end frames, simple structures, and locations where overlapping is not required.
C purlins are practical for short-span applications and straightforward connection details. They can be used as wall girts, door frame supports, end-wall members, small roof supports, and secondary framing around openings. Their profile is easy to understand on site, which can reduce confusion during installation.
However, C purlins are not always the best option for long continuous roof runs. Because they do not lap as efficiently as Z sections in many roof layouts, they may be less suitable when the structure requires continuous behavior across repeated bays. In these cases, Z purlins may offer better structural efficiency.
Z Purlins
Z purlins have a Z-shaped cross section. This shape allows adjacent members to overlap at supports. The ability to lap is one of the main reasons Z purlins are widely used in roof systems for larger steel buildings. When designed correctly, the lapped connection can improve continuity and help the purlin system perform more efficiently across multiple spans.
Z purlins are often preferred for warehouses, factories, workshops, logistics buildings, storage facilities, and other buildings with repeated bay spacing. They are especially useful when the roof layout has long runs and the design benefits from continuous purlin action.
The installation of Z purlins requires more attention to direction and overlap. If the lapping direction is wrong, the purlins may not match the erection drawings, bolt holes may not align, and the roof system may lose part of its intended structural behavior. For this reason, Z purlins should always be installed according to the approved drawings and sequence.
Why Both Profiles Are Used
Neither C purlins nor Z purlins are automatically better for every project. Each profile has its own practical use. C purlins are often useful for simpler details, wall systems, end conditions, and shorter spans. Z purlins are often better for continuous roof systems, larger buildings, and repeated frame spacing.
The best choice depends on the building design. Engineers consider the span, load, support condition, connection method, roof panel system, installation sequence, and total project cost. In many steel buildings, both C and Z sections may appear in different locations. For example, Z purlins may be used on the main roof, while C sections may be used for wall girts, framed openings, or edge conditions.
Main Uses of C and Z Purlins for Steel Buildings
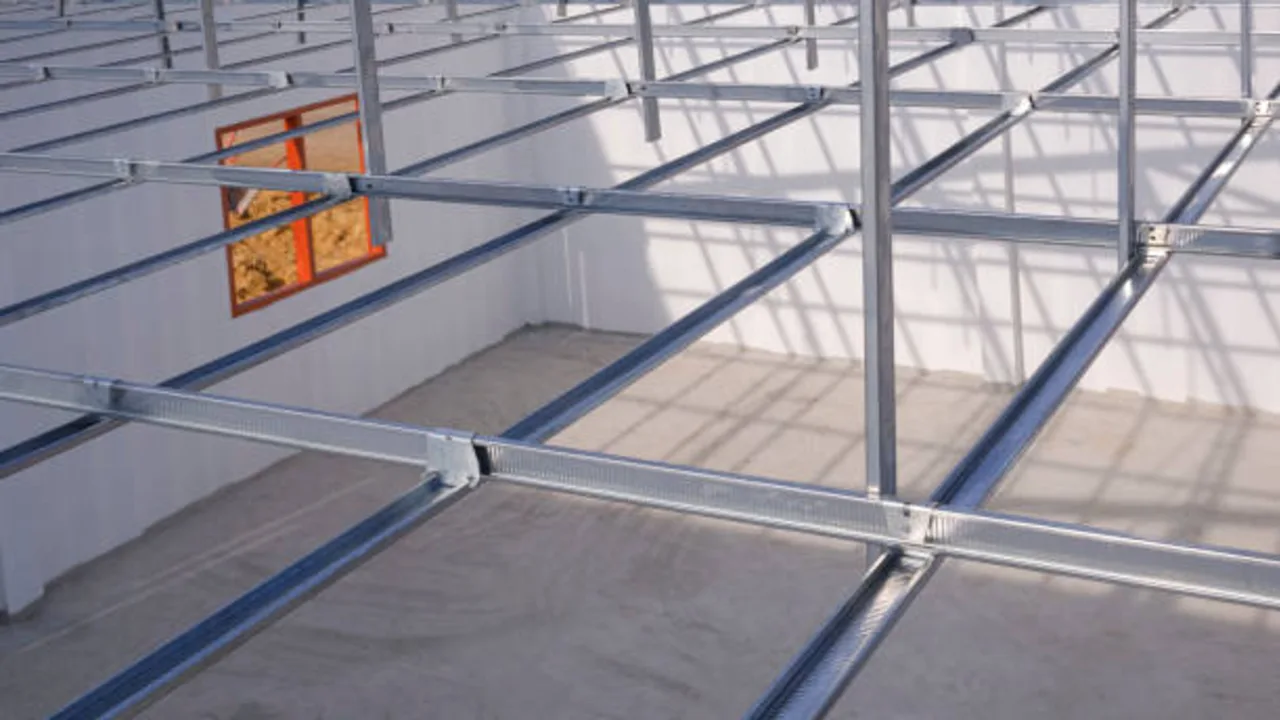
C and Z Purlins for Steel Buildings are used in many parts of the building envelope. Their main job is to support roof and wall systems while transferring loads into the main structure. Because they influence both structural performance and cladding installation, their use must be coordinated with the complete building design.
Roof Support
The most common use of purlins is roof support. Purlins are installed across rafters, portal frames, or roof trusses. Roof sheets are then fixed to the purlins with fasteners. This arrangement allows the roof load to transfer from the cladding into the purlins and then into the main frame.
Roof purlins must resist several types of loads. These may include the weight of metal sheets, insulation, ceiling systems, maintenance workers, rainwater, snow in colder regions, and wind uplift. Wind uplift is especially important because roof sheets can experience suction during strong winds. If purlins and fasteners are not designed correctly, the roof system may become vulnerable to movement or damage.
Roof purlins also affect drainage and appearance. If they are not straight or level, roof sheets may not sit properly. This can create gaps, uneven fastening, water ponding, or leakage points. Good purlin alignment is therefore essential for both structural and waterproofing performance.
Wall Support
C and Z sections can also be used as wall girts. Wall girts run horizontally between columns and support wall cladding. They help wall panels resist wind pressure and suction while keeping the building envelope straight.
Wall girts may also support insulation, façade panels, doors, windows, louvers, and other wall accessories. Because wall systems often include openings, the layout of girts must be coordinated with architectural and functional requirements. Door positions, window heights, ventilation openings, and loading bay details can all affect girt placement.
In industrial buildings, wall girts must be strong enough to handle environmental exposure. Wind forces on large wall surfaces can be significant, especially in open areas, coastal zones, or high-wind regions. Proper girt spacing and connection design help the wall system remain stable and secure.
Eave and Edge Support
Purlins and related edge members are also important near the eaves, ridges, corners, and roof edges. These areas connect the roof and wall systems. They affect flashing, gutters, trim, waterproofing, and the final appearance of the building.
At the eave, the steel detail must support roof sheets, wall sheets, gutter brackets, and edge flashing. If the eave member is weak or poorly aligned, water drainage can become a problem. Poor detailing can also create gaps between roof and wall systems.
Edge support is especially important in buildings exposed to strong wind. Corners and roof edges often experience higher wind suction than the middle areas of the building. The purlin and cladding system must be designed to handle these forces safely.
Support for Accessories
Purlins may support light accessories such as skylights, vents, small service openings, lighting supports, and lightweight roof elements. However, not every accessory can be attached directly to purlins without review. Heavy equipment, solar panel systems, ducts, pipe supports, hanging loads, and maintenance platforms may create additional forces that the original purlin design did not consider.
Before adding accessories, the project team should check whether the purlins can carry the extra load. This is especially important for existing buildings. A purlin that was designed only for roof cladding may not be suitable for new suspended systems or heavy rooftop equipment. Engineering review helps prevent overloading, deflection, fastener damage, and long-term roof problems.
Common Sizes and Selection Logic for C and Z Purlins
Purlin size should be selected through engineering calculation, not guesswork. Although many suppliers offer standard C and Z profiles, the correct size depends on the actual building conditions. Using a section that is too small can create deflection, vibration, roof sheet problems, or structural risk. Using a section that is too large may increase cost and weight without improving the building in a meaningful way.
Important selection factors include building span, bay spacing, roof slope, wind load, snow or rain load, cladding weight, insulation type, corrosion environment, deflection limits, fastener layout, and local building codes. The spacing of main frames also affects purlin design. A building with wider bay spacing usually requires stronger purlins than a building with closer frame spacing.
Depth
Purlin depth is one of the most important size factors. Deeper purlins usually provide better bending capacity and stiffness. For longer spans, deeper sections are often required to control deflection and resist load. However, depth must still match the overall roof design, connection details, and available installation space.
A deeper purlin may improve performance, but it can also affect packaging, transport, and connection height. In some projects, the best section is not simply the deepest one. It is the profile that provides the required strength and stiffness while fitting the overall building system.
Thickness
Thickness affects load capacity, durability, connection strength, and cost. Thicker purlins can usually carry higher loads and provide better resistance to local deformation. They may be needed for wider spans, higher wind loads, heavier cladding, or stronger fastener requirements.
However, thicker sections also increase steel weight and cost. If the thickness is more than the design requires, the project may waste material. The goal is to select a thickness that matches the structural demand, connection behavior, and durability requirement.
Flange and Lip Dimensions
Flanges and lips affect how cold-formed purlins behave under load. The flange provides support for roof or wall panels, while the lip helps improve local stability. These details matter because cold-formed steel members are thin compared with hot-rolled beams, so local buckling must be considered.
A well-designed flange and lip can improve stiffness, connection area, and resistance to deformation. Poor proportions can make the member more vulnerable to twisting, local buckling, or installation damage. For this reason, purlin selection should follow structural design tables or engineering calculations instead of visual judgment.
Spacing
Purlin spacing affects both structure and cladding. If spacing is too wide, roof sheets may deflect, fasteners may experience higher stress, and the roof may feel less stable during installation. If spacing is too close, the building may use more steel than necessary and increase cost.
The correct spacing depends on the roof sheet profile, sheet thickness, wind load, roof slope, insulation system, and maintenance requirements. Purlin spacing must also coordinate with skylights, vents, roof penetrations, and other accessories. Good spacing supports both safe load transfer and clean roof installation.
Installation Logic for C and Z Purlins
Good purlin performance depends not only on section size, but also on installation logic. Even if the correct C or Z profile is selected, poor installation can cause alignment problems, roof sheet gaps, bolt mismatch, leakage risk, and reduced structural reliability. For this reason, purlin installation should always follow approved erection drawings rather than site judgment alone.
In steel buildings, purlins are usually installed after the main frames are erected and temporarily stabilized. The installation team must check frame spacing, column alignment, rafter position, bracing condition, and bolt hole locations before fixing the purlins. Once the secondary steel members are installed correctly, the roof and wall cladding can be placed with better accuracy.
Start with Frame Alignment
The primary steel frame must be aligned before purlin installation begins. If columns are not vertical or rafters are not positioned correctly, purlins may appear twisted or uneven. This can later affect roof sheets, wall panels, fastener positions, and waterproofing details.
Frame alignment is especially important for long buildings with repeated bays. A small error in one frame can continue across the roof line and create larger problems at the end of the building. Checking alignment early helps reduce rework and improves the quality of the entire envelope system.
Follow the Correct Sequence
Purlins should be installed according to the erection sequence shown in the drawings. The sequence is important because some purlins also help stabilize the frame during construction. Temporary bracing may be required until enough purlins, girts, and permanent bracing are fixed in place.
Z purlins require special attention because they often lap at supports. The lapping direction must match the structural design. If workers reverse the direction, bolt holes may not align, the overlap may not work as intended, and the roof system may lose part of its designed continuity.
For C purlins, the installation sequence may be simpler, but accuracy is still important. Wall girts, end-wall members, and framed opening supports must be placed correctly so that wall panels, doors, windows, and trim can be installed without conflict.
Check Lap and Connection Details
Z purlins are often overlapped at frame supports. This overlap is not just a construction convenience. It can be part of the structural design. The lap length, bolt quantity, bolt spacing, and support position all affect how the purlin transfers force.
If the lap is too short, incorrectly positioned, or missing bolts, the purlin may not perform as designed. If the wrong member is placed in the wrong location, installation may continue for several bays before the error becomes visible. Clear marking, drawing review, and site inspection help prevent these problems.
Control Straightness and Level
Purlins directly affect roof and wall alignment. If the purlin line is uneven, the cladding will also be uneven. This can create poor appearance, irregular fastener lines, roof sheet distortion, water leakage, or difficulty installing insulation and flashing.
Installers should check purlin straightness, level, and spacing before roof sheets are fixed. Corrections are much easier before cladding installation. Once roof panels are installed, adjusting purlins becomes more difficult and may require removing finished work.
Connection Details That Matter
Connections determine how loads move from roof sheets and wall panels into purlins, then from purlins into the main steel frame. A purlin system is only reliable when its connections are designed and installed correctly. Small connection errors can create large performance problems, especially under wind uplift or repeated loading.
Connection details should consider load transfer, installation speed, tolerance, corrosion protection, inspection access, and long-term stability. The correct connection method depends on the building design, member profile, load condition, and fabrication system.
Bolted Connections
Bolted connections are common in prefabricated steel buildings because they are fast, practical, and easier to inspect than many site-welded details. Purlins may be connected to cleats, brackets, rafters, or truss members through pre-punched holes.
Accurate hole location is important. If the holes do not align, workers may try to enlarge holes on site, force members into position, or delay installation while waiting for correction. Good fabrication control reduces these issues. Bolted connections should follow approved bolt size, quantity, spacing, washer use, and tightening requirements.
Cleats and Brackets
Cleats and brackets are often used to connect purlins to the primary frame. They provide a connection surface and help position the purlin correctly. Poor cleat placement can cause installation conflicts, uneven purlin lines, or difficulty fixing roof panels.
Cleats should be fabricated and welded according to the detailed drawings. Their location must match purlin spacing and orientation. In buildings with many repeated bays, even a small cleat error can affect many members and create repeated site problems.
Fasteners for Roof and Wall Panels
Roof and wall panels depend on correct fastener layout. Fasteners must connect the cladding securely to the purlins or girts. If purlin spacing does not match the roof sheet design, the cladding may not have enough support or the fasteners may not sit in the correct locations.
Fastener selection must also consider wind uplift, panel profile, insulation thickness, washer performance, corrosion environment, and installation quality. Over-tightening can damage washers or sheets, while under-tightening can create movement and leakage. The purlin layout and cladding system should therefore be coordinated before installation begins.
C and Z Purlins in Prefabricated Steel Buildings
In prefabricated steel buildings, purlins are usually pre-cut, punched, marked, bundled, and shipped to site as part of the complete steel package. This improves installation speed because workers do not need to measure, cut, and drill every member on site. Instead, they can follow the erection drawings and install each member according to its mark.
Factory preparation also improves consistency. Purlin length, hole location, lap detail, coating, and bundle sequence can be controlled before shipment. This reduces site uncertainty and helps the project team manage time more effectively.
For export projects or remote construction sites, pre-marked C and Z purlins are especially valuable. They help local installation teams identify the correct member and reduce the risk of wrong placement. When purlins are bundled according to building zone or installation sequence, site handling becomes easier.
However, prefabrication requires accurate early planning. If the roof layout changes after fabrication, purlins may need modification. If the cladding system changes, spacing or fastener details may also change. For this reason, the purlin design should be coordinated with the main frame, roof panels, wall panels, insulation, doors, windows, gutters, and accessories before production begins.
Advantages of Using C and Z Purlins
C and Z purlins are widely used because they provide a practical balance of strength, weight, cost, and installation efficiency. They are suitable for many steel building types, from simple storage sheds to large industrial warehouses and factory buildings.
Lightweight but Strong
Cold-formed purlins offer a strong strength-to-weight ratio. They are lighter than many hot-rolled members but still provide effective support for roof and wall systems when designed correctly. Their light weight also helps reduce transportation effort and makes site handling easier.
Fast Installation
Pre-punched holes, standard profiles, clear member marking, and bolted connections can make installation faster. In prefabricated steel projects, workers can install purlins quickly once the main frames are aligned. This supports shorter construction schedules and more predictable site progress.
Flexible for Different Building Types
C and Z purlins can be used in warehouses, workshops, factories, agricultural buildings, commercial halls, logistics centers, and storage facilities. Different profiles and sizes can be selected according to span, load, and cladding requirements. This flexibility makes them useful across many steel building applications.
Efficient Material Use
Z purlins can be efficient for continuous roof runs because they can lap at supports and work across repeated spans. C purlins can be efficient for shorter spans, wall systems, framed openings, and simpler construction details. When each profile is used in the right location, the building can achieve better material efficiency.
Compatible with Metal Roofing and Wall Systems
C and Z purlins work well with common metal roofing, wall panels, insulation systems, flashing, gutters, and other envelope components. Their spacing and position can be coordinated with roof sheet profiles and wall panel layouts, helping create a cleaner and more reliable building envelope.
Common Mistakes in Purlin Design and Installation
Many purlin problems are caused by weak coordination rather than the purlin profile itself. A good C or Z section can still perform poorly if it is selected without calculation, installed in the wrong direction, or overloaded after construction. Avoiding common mistakes helps improve the reliability of the whole steel building.
Choosing Size Only by Experience
Some projects choose purlin sizes based only on past experience or common practice. This can be risky because every building has different span, wind load, roof slope, cladding weight, and spacing requirements. Purlins should be selected through structural calculation or approved design tables.
Ignoring Wind Uplift
Roof purlins must resist both downward loads and upward forces. Wind uplift can be strong at roof edges, corners, and exposed locations. If uplift is ignored, the roof system may face fastener damage, sheet movement, or member overstress during strong wind events.
Wrong Lap Direction for Z Purlins
Z purlins are often designed with a specific lap direction. Installing them in the wrong direction can affect load transfer and create bolt alignment problems. The erection team should check the drawings carefully before placing Z purlins, especially on large roofs with repeated bays.
Poor Coordination with Roof Panels
Purlin spacing must match the roof panel system. If spacing is too wide for the selected sheet profile, the roof may deflect or feel unstable. If purlins do not align with panel fastening zones, installation quality may suffer. Roof cladding and purlin design should be coordinated as one system.
Adding Loads After Installation
After a building is completed, owners may want to add solar panels, ducts, pipes, lights, suspended ceilings, or maintenance platforms. These added loads should not be attached to purlins without engineering review. A purlin designed for roof cladding may not be suitable for heavy additional loads.
How to Choose Between C and Z Purlins
Choosing between C and Z purlins requires understanding the building function, span, support condition, and installation method. The decision should not be based only on habit or price. The correct profile is the one that fits the structural design and building envelope.
| Factor | C Purlins | Z Purlins |
|---|---|---|
| Profile shape | C-shaped section with simple orientation | Z-shaped section that can lap at supports |
| Typical use | Wall girts, short spans, end frames, framed openings, simple roof areas | Main roof purlins, continuous spans, repeated bays, larger buildings |
| Span logic | Practical for shorter or simpler spans | Efficient for continuous roof runs and longer repeated layouts |
| Installation notes | Easier orientation and straightforward connection details | Requires correct lap direction and careful bolt alignment |
| Project suitability | Small buildings, wall systems, edge conditions, simple layouts | Warehouses, factories, workshops, logistics buildings, large steel roofs |
In many projects, the best solution is not choosing only one profile. C purlins may be used in wall systems and end conditions, while Z purlins may be used across the main roof. This combination allows each profile to serve the location where it performs best.
Conclusion
C and Z Purlins for Steel Buildings may be secondary members, but they have a major influence on roof support, wall alignment, cladding performance, installation speed, and long-term building reliability. They connect the main steel frame with the roof and wall envelope, helping the structure work as one coordinated system.
C purlins are practical for shorter spans, wall girts, framed openings, and simpler details. Z purlins are efficient for continuous roof systems, repeated bays, and larger steel buildings. The right selection depends on span, load, spacing, cladding type, connection detail, wind uplift, corrosion protection, and erection sequence.
A reliable purlin system begins with proper engineering and continues through accurate fabrication, clear marking, careful transport, correct installation, and final inspection. When C and Z purlins are planned correctly, they help the steel building achieve better strength, cleaner cladding alignment, faster assembly, and more dependable long-term performance.