The difference between C and Z purlins is one of the most important details to understand when planning a steel structure building. Purlins may look like small secondary members compared with columns, rafters, trusses, and portal frames, but they directly affect roof strength, wall support, panel alignment, installation speed, and long-term building performance.
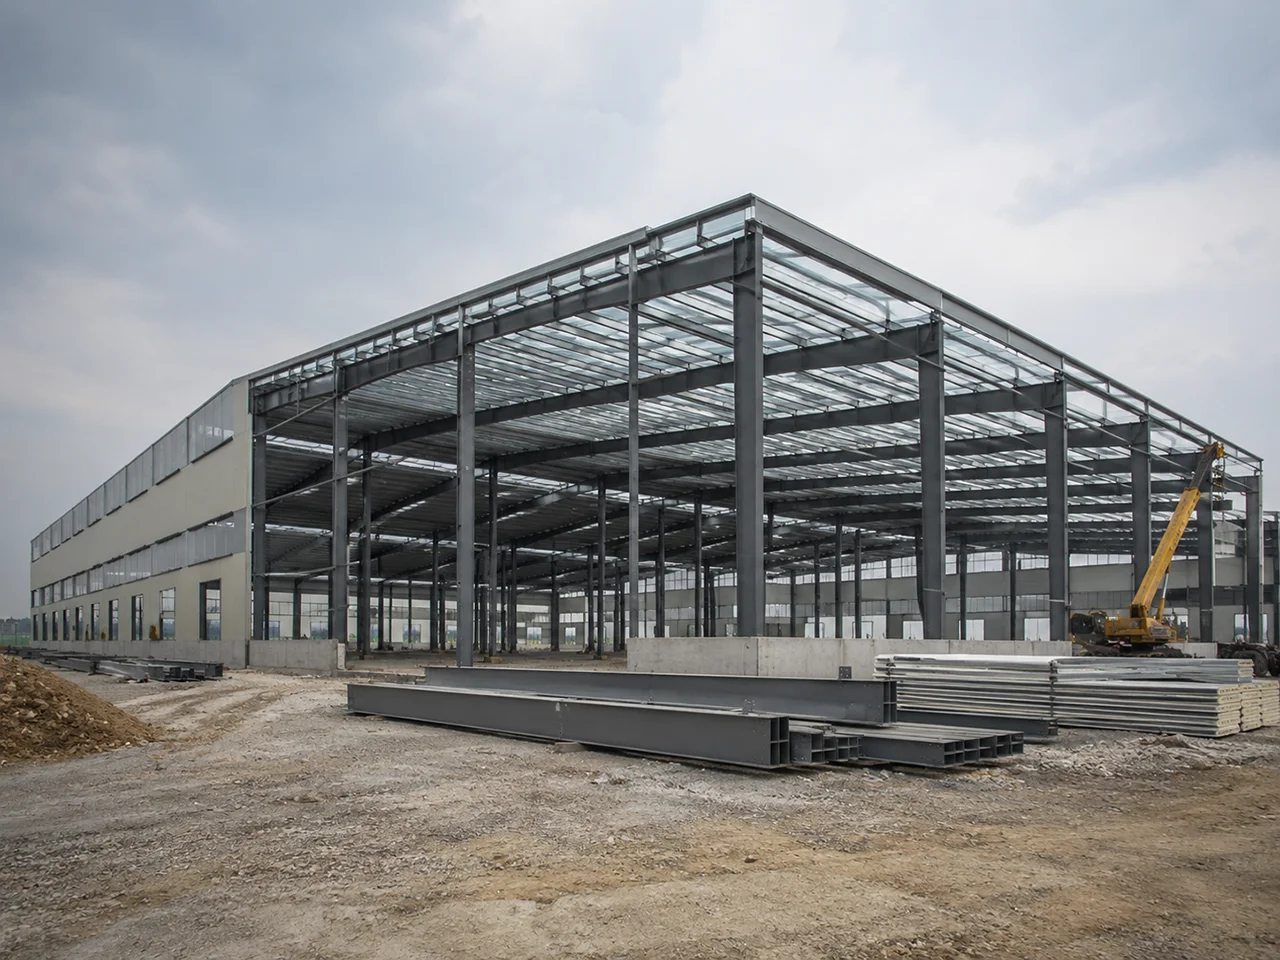
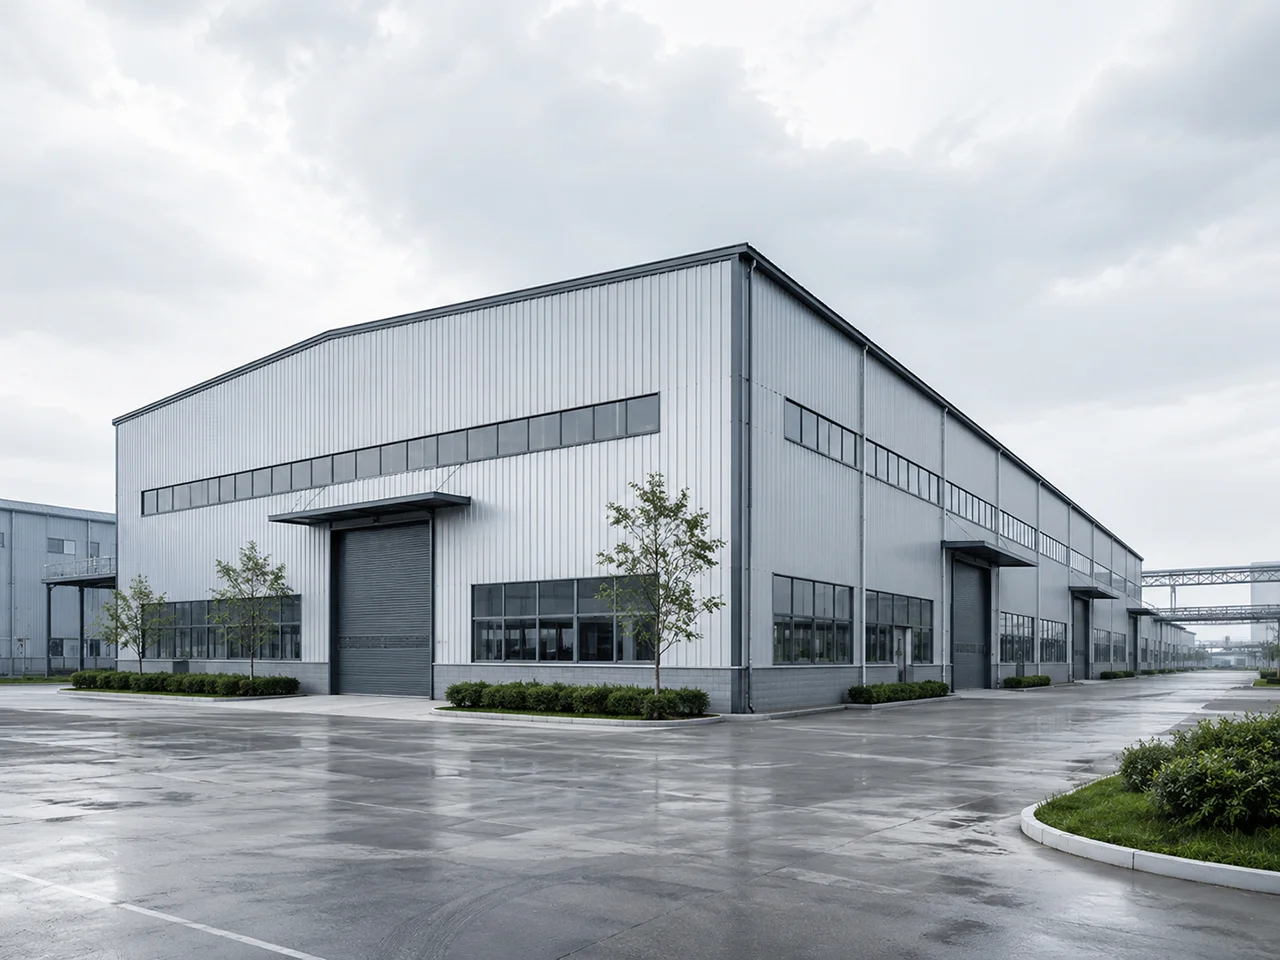
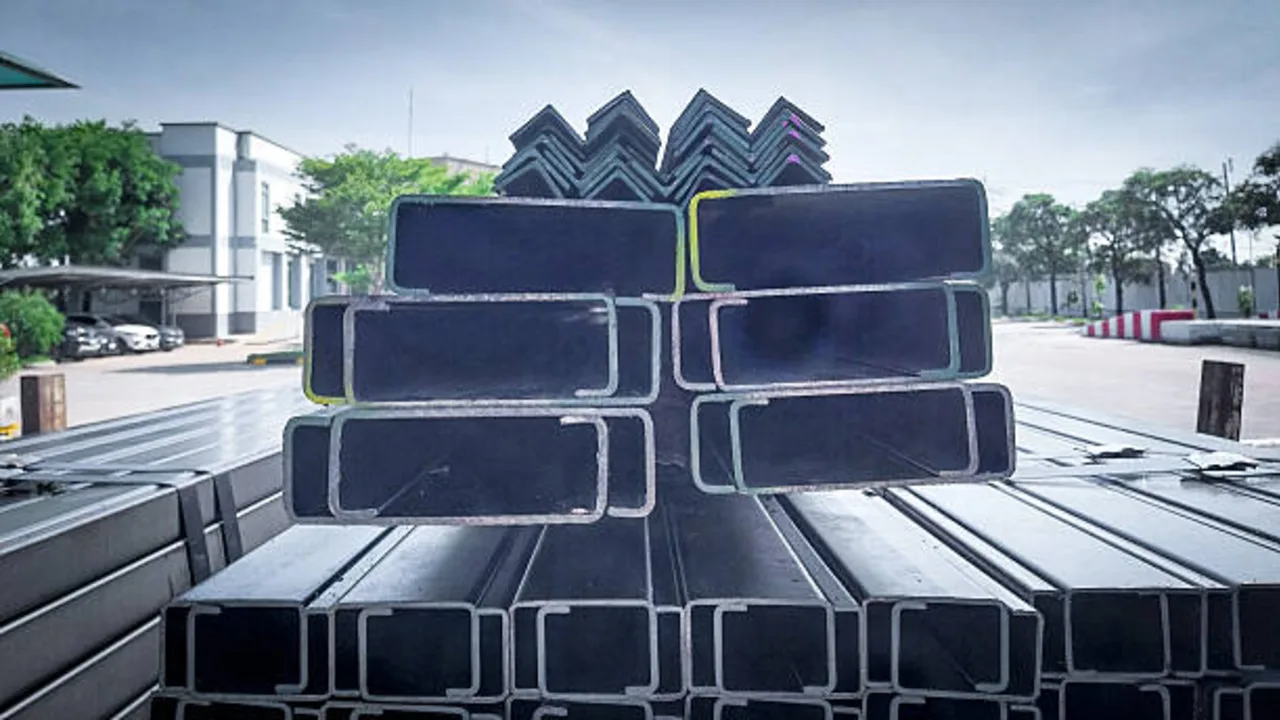
In steel structure construction, C purlins and Z purlins are commonly used to support roof sheets, wall panels, insulation layers, fasteners, and loads transferred from the building envelope to the main frame. They are usually cold-formed steel members, which means they are shaped from steel coils or sheets into specific profiles. Because they are lighter than main structural members, they are efficient for repeated roof and wall framing across warehouses, factories, workshops, agricultural buildings, logistics centers, and prefabricated steel buildings.
Many buyers compare C purlins and Z purlins only by shape, but the real difference goes deeper. The profile affects how the member connects, how it spans between frames, whether it can overlap at supports, how it behaves under load, and how easily it can be installed on site. Choosing the wrong purlin type can lead to unnecessary steel weight, difficult installation, weak continuity, poor roof alignment, or higher long-term maintenance risk.
This guide explains the practical difference between C and Z purlins from a steel structure construction perspective. Instead of treating them as simple accessories, it looks at their role in the full building system and helps show when each type is more suitable.
What Are Purlins in Steel Structure Construction?
Purlins are horizontal secondary steel members installed between the main structural frames. In roof systems, they are usually fixed across rafters, trusses, or portal frames to support roofing sheets. In wall systems, similar secondary members are often called girts, and they support wall cladding. Together, these secondary members connect the building envelope to the primary steel frame.
Although purlins are not usually the largest steel members in a building, they are highly important. They support roof panels, help transfer wind loads, resist uplift forces, maintain spacing between roof sheets, and assist with overall roof alignment. In many buildings, purlins also help restrain rafters and improve the stability of the roof system.
A roof system with poor purlin selection can create many problems. Panels may deflect, fasteners may loosen, roof sheets may vibrate, water drainage may be affected, and installation may become slower. For buildings in windy, rainy, coastal, or industrial environments, the purlin system must be planned carefully because roof performance directly affects the durability of the entire building.
Primary Structure vs Secondary Structure
The primary structure of a steel building includes the main load-bearing components. These usually include columns, beams, rafters, portal frames, trusses, and sometimes crane beams or floor beams. These members carry the major loads and transfer them to the foundation.
The secondary structure includes purlins, wall girts, eave struts, sag rods, bracing members, small framing supports, and other connecting elements. These members may be lighter, but they still have a major impact on how the building performs. The roof and wall panels depend on them for alignment and support.
In a complete steel structure system, the primary and secondary structures must work together. The main frame provides strength, while the secondary members distribute loads from the roof and wall envelope back to the main frame. That is why purlin type, spacing, connection details, coating, and installation sequence should not be treated as minor details.
What Are C Purlins?
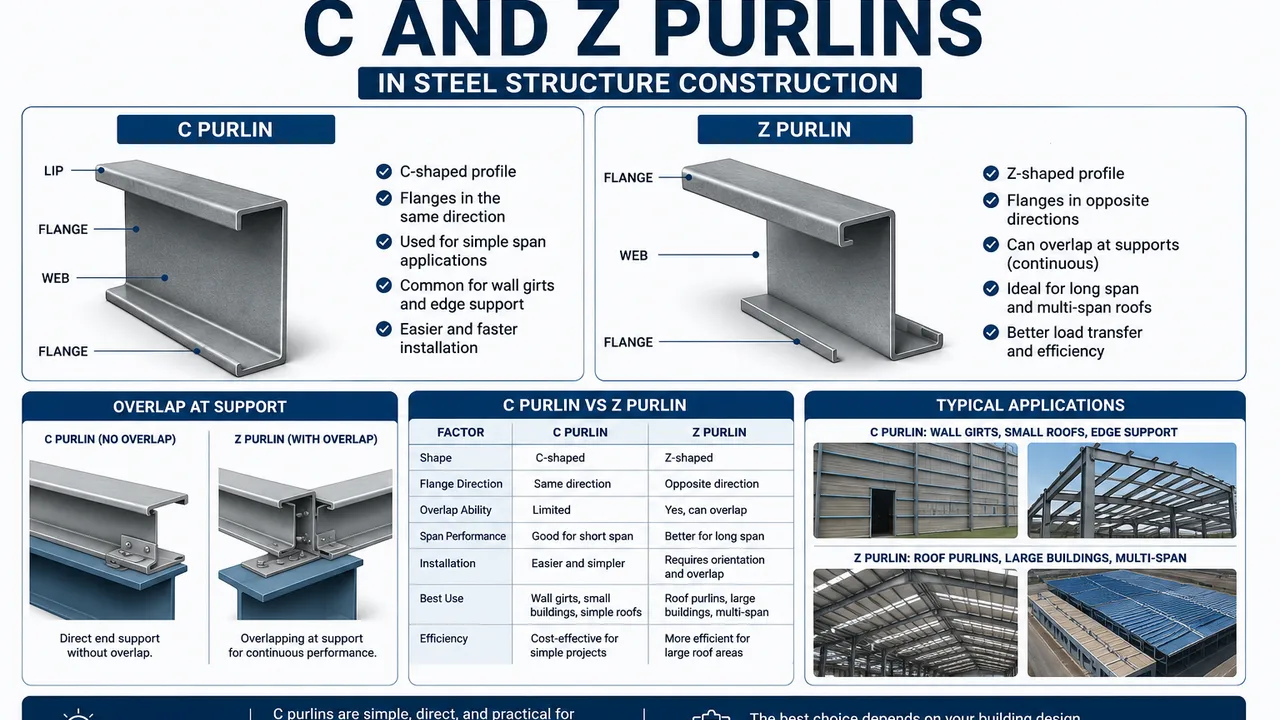
C purlins are cold-formed steel members with a profile shaped like the letter “C”. They have a web, two flanges, and often small lips at the flange edges to improve stiffness. Their shape is simple, easy to recognize, and practical for many roof and wall framing conditions.
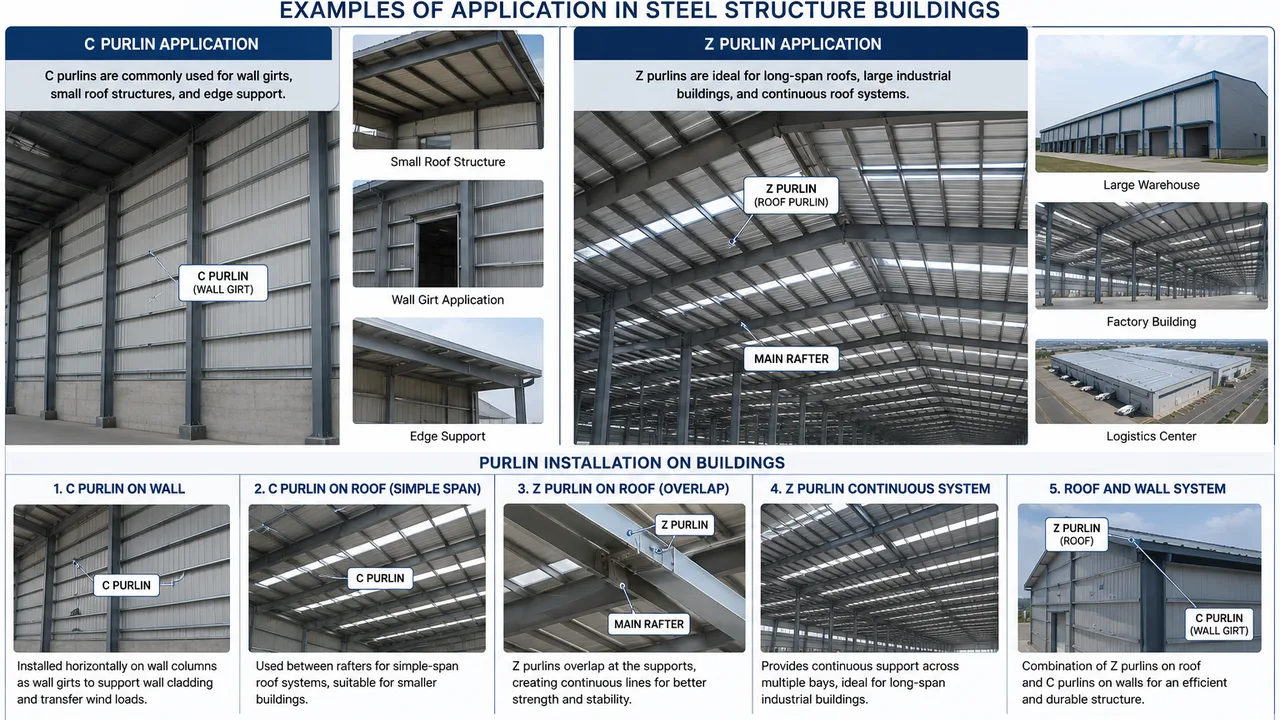
Because of their straightforward profile, C purlins are commonly used in simple-span conditions, wall girts, end-wall framing, small steel buildings, and edge support members. They are also useful when the project requires simple cutting, drilling, bolting, and alignment. For many smaller steel buildings, C purlins provide a practical balance between strength, availability, and ease of installation.
C purlins are often selected where continuous overlapping is not required. They are easy to position against cleats, brackets, rafters, or wall supports. Their open shape makes them simple for workers to understand during installation, especially in small or medium projects with less complex framing.
Common Features of C Purlins
C purlins have several practical characteristics that make them useful in steel structure construction. Their shape is direct, and their connection method is usually simple. They can be cut to length, punched with bolt holes, galvanized or coated, marked for installation, and delivered to site as part of a prefabricated steel building package.
They are often used for wall girts because wall systems usually need straight, repeated support lines for cladding panels. C purlins are also useful around door frames, window openings, small roof areas, end walls, partition supports, and other secondary framing locations where the loads are manageable and the span is not too long.
The main advantage of C purlins is simplicity. They are easy to install and suitable for many straightforward building layouts. However, that simplicity also means they are not always the best choice for long continuous roof systems where overlapping and multi-span behavior can improve efficiency.
What Are Z Purlins?
Z purlins are cold-formed steel members with a profile shaped like the letter “Z”. Their flanges are offset in opposite directions, which allows one purlin to overlap with another at a support. This lapping ability is one of the biggest reasons Z purlins are widely used in large steel structure buildings.
In roof construction, Z purlins are commonly installed across multiple frames or bays. Because they can overlap at supports, they can create better continuity across the roof line. This helps improve load transfer and can make the purlin system more efficient for larger buildings, long roof runs, and repeated bay layouts.
Z purlins are especially common in warehouses, factories, logistics buildings, agricultural steel buildings, and large prefabricated steel structures. These projects often have long roof areas and repeated structural bays, making continuity and installation efficiency important.
Common Features of Z Purlins
The offset shape of Z purlins makes them different from C purlins in both appearance and performance. Because the flanges face opposite directions, Z purlins can nest and lap at support points. This creates a more continuous roof framing system compared with simple-span members.
Z purlins are often selected for roof systems where span efficiency matters. They can perform well across multiple bays when the lap length, bolt spacing, orientation, and support conditions are designed correctly. This makes them efficient for industrial buildings where many purlin lines repeat across the roof.
However, Z purlins require more attention during installation. The direction of the profile, overlap position, bolt connection, and layout sequence must follow the drawings. If Z purlins are installed in the wrong direction or with poor lap details, their expected performance can be reduced.
Main Difference Between C and Z Purlins
The main difference between C and Z purlins comes from their shape, connection behavior, and structural use. C purlins have a simpler C-shaped profile and are often used for simple spans, wall framing, and smaller building areas. Z purlins have an offset Z-shaped profile and are commonly used for continuous roof framing, longer spans, and multi-bay steel buildings.
In simple terms, C purlins are easier and more direct, while Z purlins are more efficient when overlap and continuity are needed. The best choice depends on the building size, roof span, bay spacing, load conditions, roof panel system, installation method, and engineering design.
Shape and Profile
C purlins have a C-shaped profile with the flanges extending in the same direction. This makes the member simple to place, align, and connect. The shape is easy to understand on site and is often practical for wall girts, edge supports, and simple roof framing.
Z purlins have an offset profile where the flanges extend in opposite directions. This shape allows one purlin to overlap another at a support. The overlap is important because it can improve continuity and load transfer in multi-span roof systems.
The profile shape also affects how the members are packed, handled, and installed. C purlins are straightforward, while Z purlins require correct orientation. This is why installation drawings and member markings are especially important when Z purlins are used.
Structural Behavior
C purlins are often used as simple-span members. They perform well when the support condition is direct and the span is reasonable. For smaller buildings or wall support systems, this can be fully practical and cost-effective.
Z purlins can perform more efficiently in continuous-span systems because of their ability to lap at supports. When properly designed, this lapping behavior helps the purlin line act more continuously across multiple bays. The result can be better stiffness, improved load distribution, and more efficient use of steel.
This does not mean Z purlins are always stronger in every situation. The final performance depends on purlin depth, thickness, steel grade, span, spacing, roof load, wind uplift, connection details, and support layout. The correct comparison should always be based on project conditions, not profile name alone.
Overlapping Ability
Overlapping ability is one of the clearest differences between C and Z purlins. C purlins are not usually used for continuous lapping in the same way as Z purlins. They can be connected to supports, cleats, or brackets, but their shape does not naturally allow the same type of overlap at frame lines.
Z purlins are designed with opposite flanges, so one member can overlap another at the support. This makes them highly practical for long roof runs in industrial steel buildings. When the overlap is designed correctly, it improves continuity and helps the purlin system transfer loads more smoothly across multiple bays.
This is especially useful in warehouses, factories, logistics centers, and agricultural steel buildings where the roof has repeated bay spacing. Instead of treating every bay as a separate simple span, the Z purlin system can behave more like a continuous line. That can improve stiffness and reduce unnecessary material use when properly engineered.
Installation Method
C purlins are usually easier to install because their shape is straightforward. Workers can identify the open side, align the member with the cleat, and bolt it into position. This makes C purlins practical for smaller projects, wall framing, and areas where speed and simplicity matter more than continuous overlap.
Z purlins require more careful installation. Their orientation matters because the overlap direction must follow the roof layout. The lap length, bolt holes, support positions, and member sequence must match the installation drawings. If the Z purlins are reversed or overlapped incorrectly, the roof system may not perform as intended.
For large steel buildings, this does not mean Z purlins are difficult to use. It means they need proper labeling, clear drawings, and experienced installation control. When fabrication and site work are coordinated, Z purlins can be installed efficiently across large roof areas.
Span Capacity
C purlins are practical for shorter spans, simpler roof layouts, wall girts, and small to medium steel buildings. They can perform well when the spacing, load, thickness, and connection details are properly designed. For many wall and edge framing conditions, C purlins are a simple and effective choice.
Z purlins are usually more efficient for longer spans and multi-bay roof structures because they can overlap at supports. The continuous behavior created by lapping can improve stiffness and load distribution. This is why Z purlins are widely used as roof purlins in large steel structure construction.
However, span capacity should never be judged only by the profile name. A deep C purlin may perform better than a shallow Z purlin in some conditions. A thick Z purlin may support larger loads than a thin one. Final performance depends on section depth, steel thickness, steel grade, purlin spacing, support spacing, roof panel type, wind uplift, live load, and connection design.
C Purlins vs Z Purlins: Comparison Table
| Factor | C Purlins | Z Purlins |
|---|---|---|
| Shape | C-shaped profile with flanges facing the same direction | Z-shaped offset profile with flanges facing opposite directions |
| Best Use | Simple spans, wall girts, edge framing, and smaller buildings | Multi-span roofs, long roof lines, and large steel buildings |
| Overlap | Limited overlapping ability | Strong lapping ability at supports |
| Installation | Easier and more direct | Requires correct orientation and lap sequence |
| Span Performance | Good for shorter or simpler spans | Better for longer and continuous spans |
| Cost Efficiency | Cost-effective for smaller or simple projects | Efficient for large roof areas and repeated bays |
| Common Applications | Wall girts, small roof systems, end-wall framing, and support members | Roof purlins, warehouses, factories, and industrial buildings |
When to Use C Purlins
C purlins are a good choice when the project needs simple framing, shorter spans, direct installation, and practical connection details. They are commonly used in smaller steel structures where the roof or wall system does not require continuous lapping across many bays.
They are also useful when the project has many edge conditions, openings, or wall support requirements. Because C purlins are easy to align and connect, they work well around doors, windows, end walls, partitions, and smaller roof sections. Their simple profile makes site installation easier for teams working on less complex building layouts.
For small workshops, garages, sheds, agricultural storage buildings, and simple steel structures, C purlins can be a cost-effective solution. They provide enough support when the loads and spans are within the designed range, and they reduce unnecessary installation complexity.
Practical Applications of C Purlins
C purlins are often used as wall girts because wall cladding needs repeated horizontal support lines. They can also be used in roof systems for smaller buildings, especially where the roof span is not long and continuous overlap is not necessary.
They are useful around door and window frames, where simple secondary support is needed. They may also be used as edge members, framing around openings, partition supports, and other non-primary steel elements.
In many prefabricated steel buildings, C purlins are included as part of the secondary steel package. They are cut, punched, marked, coated, and delivered with the main steel members so the site team can install them according to the layout drawings.
When to Use Z Purlins
Z purlins are often preferred for larger buildings, longer roof runs, and multi-span roof systems. Their ability to overlap at supports makes them efficient for repeated bay layouts, which are common in warehouses, factories, logistics centers, agricultural buildings, and large prefabricated steel structures.
When the roof system has many frames in a row, Z purlins can create better continuity than simple-span members. This can help reduce deflection, improve load transfer, and make the roof framing more efficient. For large industrial buildings, this efficiency can make a significant difference in material planning and installation performance.
Z purlins are also suitable when the roof needs stronger support against wind uplift or when the building has long, repeated roof lines. The lapped connection at supports can help the purlin system behave as a more unified structure, provided the engineering design and installation are correct.
Practical Applications of Z Purlins
Z purlins are commonly used as main roof purlins in industrial steel buildings. They are practical for long-span roof framing, multi-bay buildings, and projects where the same purlin line continues across several frames.
They are often found in warehouses, factories, manufacturing workshops, logistics centers, poultry houses, storage buildings, and large agricultural steel structures. These projects usually benefit from repeated roof framing and efficient purlin continuity.
Z purlins are also useful when installation planning is well organized. With correct member marking, hole punching, packaging, and erection sequence, they can support fast installation across large roof areas.
How Purlin Choice Affects Steel Building Performance
The choice between C and Z purlins affects more than the price of secondary steel. It influences roof strength, wall support, panel alignment, installation speed, wind resistance, maintenance requirements, and the overall durability of the building envelope.
A steel building can have strong columns and frames, but if the purlin system is poorly selected, the roof and wall system may still perform badly. Panels may not align correctly, fasteners may experience stress, roof deflection may become visible, and water leakage risk may increase. This is why purlin design should be coordinated with the full steel structure system.
Roof Panel Support
Purlins provide fixing points for roof panels. The spacing, alignment, and stiffness of the purlins affect how well the panels sit on the roof frame. If purlins are too far apart or too flexible, roof sheets may deflect, vibrate, or lose proper contact with fasteners.
Correct purlin support helps roof panels maintain alignment and drainage. This is important in rainy environments because roof slope, panel lap, fastener position, and gutter flow all work together. Poor purlin layout can create uneven panel surfaces and increase the risk of water problems.
Wind and Uplift Resistance
Roof purlins play an important role in resisting wind uplift. When wind pulls upward on roof sheets, that force must transfer through fasteners, purlins, connections, rafters, columns, and foundations. Weak purlin connections can reduce the reliability of the whole roof system.
In windy regions, purlin spacing, connection strength, fastener type, roof panel profile, and bracing layout must be reviewed carefully. Z purlins are often useful in larger roofs where continuity helps distribute uplift forces, but the final design must still follow engineering calculations.
Building Stability
Purlins can also contribute to the stability of the roof structure. They help restrain rafters, support roof sheeting, and work with bracing members to maintain the correct geometry of the building. This is especially important in portal frame buildings where roof members must remain aligned under load.
However, purlins should not be expected to replace the main stability system. They work together with bracing, main frames, connections, and cladding. A complete design must consider all these elements as one building system.
Common Mistakes When Choosing C and Z Purlins
One common mistake is choosing purlins based only on price. Lower material cost does not always mean lower project cost. If the wrong purlin type causes slower installation, extra steel, poor roof alignment, or maintenance problems, the final cost can be higher.
Another mistake is using C purlins where Z purlins would perform better in a continuous roof system. For small projects, C purlins may be fully suitable. But for long industrial roof lines, Z purlins may offer better continuity and efficiency.
Incorrect Z purlin overlap is also a frequent problem. The lap direction, lap length, bolt holes, and support positions must follow the design. If workers install Z purlins in the wrong orientation, the expected structural benefit may be reduced.
Some projects also ignore coordination with roof panels. Purlin spacing should match the roof sheet profile, fastener pattern, insulation system, skylights, vents, and drainage design. If these items are decided too late, the project may need changes on site.
Corrosion protection is another important issue. Purlins in humid, coastal, agricultural, or industrial environments may need galvanized steel or suitable protective coatings. Treating purlins as minor parts can lead to long-term corrosion and roof maintenance problems.
Fabrication and Installation Considerations
Good purlin performance starts before the members arrive at site. During fabrication, purlins should be cut to the correct length, punched with accurate holes, coated or galvanized as required, marked clearly, packed properly, and delivered according to the installation sequence.
Clear labeling is especially important for Z purlins because orientation and lap sequence matter. If members are not marked well, workers may waste time identifying positions or may install purlins incorrectly. Good packaging and delivery planning can reduce handling time and prevent damage to coatings.
Connection Details
Purlins are usually connected to rafters, trusses, or cleats using bolts. The connection must transfer loads safely while allowing efficient installation. Hole positions, bolt size, lap length, support width, and edge distance should match the engineering drawings.
For Z purlins, lap connections are especially important. The lapped area must be long enough and bolted correctly to achieve the intended continuity. For C purlins, connection details are usually more direct, but they still require proper alignment and fastening.
Coating and Corrosion Protection
Purlins are often galvanized or painted to protect against corrosion. The right protection depends on the building environment. A dry indoor warehouse may need a different coating strategy from a coastal factory, livestock building, fertilizer storage facility, or chemical plant.
Coating protection should also consider transportation and installation. Scratches, impact damage, and field cutting can expose steel surfaces. Site touch-up procedures should be included when corrosion protection is important to long-term performance.
How to Choose Between C and Z Purlins
The best way to choose between C and Z purlins is to look at the building function, roof span, bay spacing, load conditions, roof panel system, installation method, and long-term use. A simple building may not need the same purlin strategy as a large industrial warehouse.
Use C purlins when the framing is simple, spans are shorter, wall girts are needed, or direct installation is more important than continuous lapping. Use Z purlins when the roof has longer spans, repeated bays, large roof areas, or when overlapping can improve structural efficiency.
For a complete secondary steel system, C and Z Purlins should be selected together with the main frame design, roof cladding, wall cladding, bracing layout, corrosion protection, and installation plan. Purlins may be secondary members, but they are part of the full building performance.
Key Questions Before Selection
- What is the roof span?
- What is the purlin spacing?
- What type of roof panel will be used?
- Is the building single-span or multi-span?
- Are there high wind loads or uplift forces?
- Does the roof system need overlap and continuity?
- What corrosion environment will the building face?
- How important is installation speed?
- Will the building need future expansion?
These questions help the project team avoid choosing purlins based only on habit or price. The right decision should come from engineering logic and actual building requirements.
Conclusion
The difference between C and Z purlins is mainly about profile shape, connection behavior, overlap ability, span performance, and installation use. C purlins are simple, practical, and easy to install. They are often suitable for wall girts, smaller roof systems, end-wall framing, and shorter spans.
Z purlins are more efficient for continuous roof systems, longer spans, repeated bays, and large steel buildings. Their ability to overlap at supports gives them an advantage in many industrial and commercial roof structures, especially when proper design and installation control are applied.
The best choice is not always one type for every project. It depends on the building size, structural layout, roof loads, wind conditions, panel system, corrosion environment, and installation plan. When C purlins and Z purlins are selected correctly, they help create a stronger, cleaner, faster, and more reliable steel structure building.