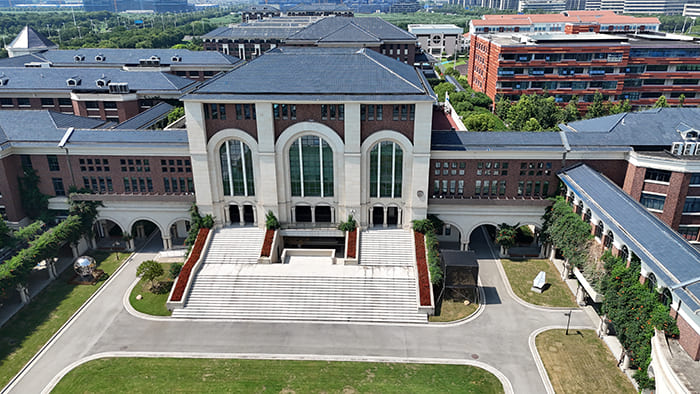
C and Z Purlins are important secondary framing members in steel buildings. They may look smaller than columns, beams, rafters, or trusses, but they play a major role in how the roof and wall system performs. In warehouses, factories, workshops, agricultural buildings, logistics centers, and commercial steel buildings, purlins help support roof sheets, wall panels, insulation, accessories, and wind-resistant cladding systems.
A steel building does not work only because of its main frame. The roof and wall envelope also need stable support. Purlins and girts connect the building envelope to the primary structural frame, transfer loads, maintain panel alignment, and help the installation team build faster and more accurately. When these members are selected correctly, the roof and wall system becomes easier to install and more reliable over time.
For industrial and commercial projects, purlin design should not be treated as a small detail at the end of the project. Purlin profile, thickness, spacing, coating, hole location, connection method, and installation sequence can all affect roof performance, wall appearance, weather resistance, and long-term maintenance. A strong primary frame still needs well-planned secondary steel framing to perform as a complete building system.
This is why C and Z profiles are widely used in prefabricated steel buildings. They offer practical strength, efficient production, fast installation, and flexible application across roof and wall framing systems. The best choice depends on building use, span, loading, cladding type, environment, and project coordination.
What Are C and Z Purlins?
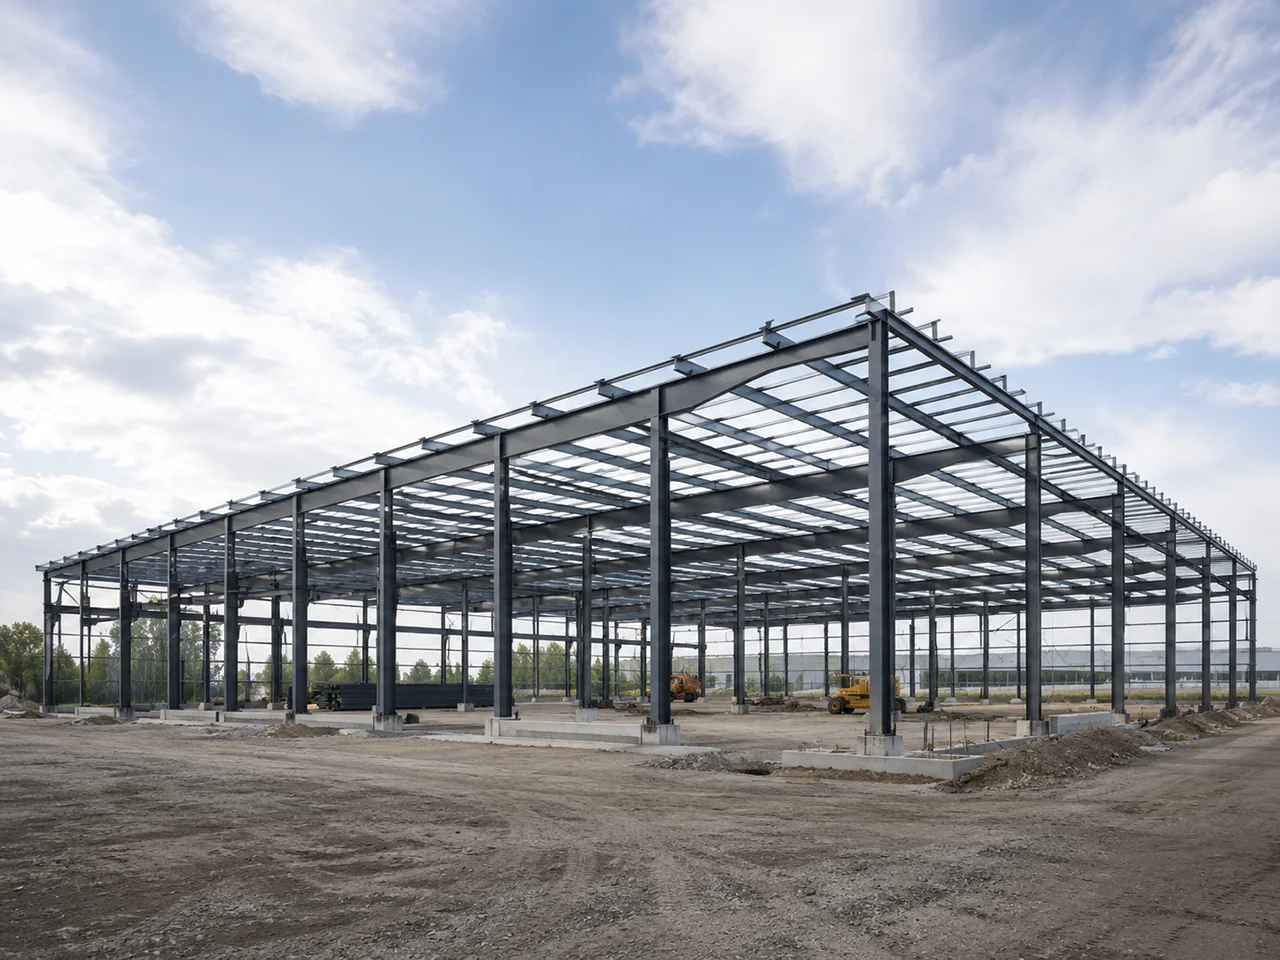
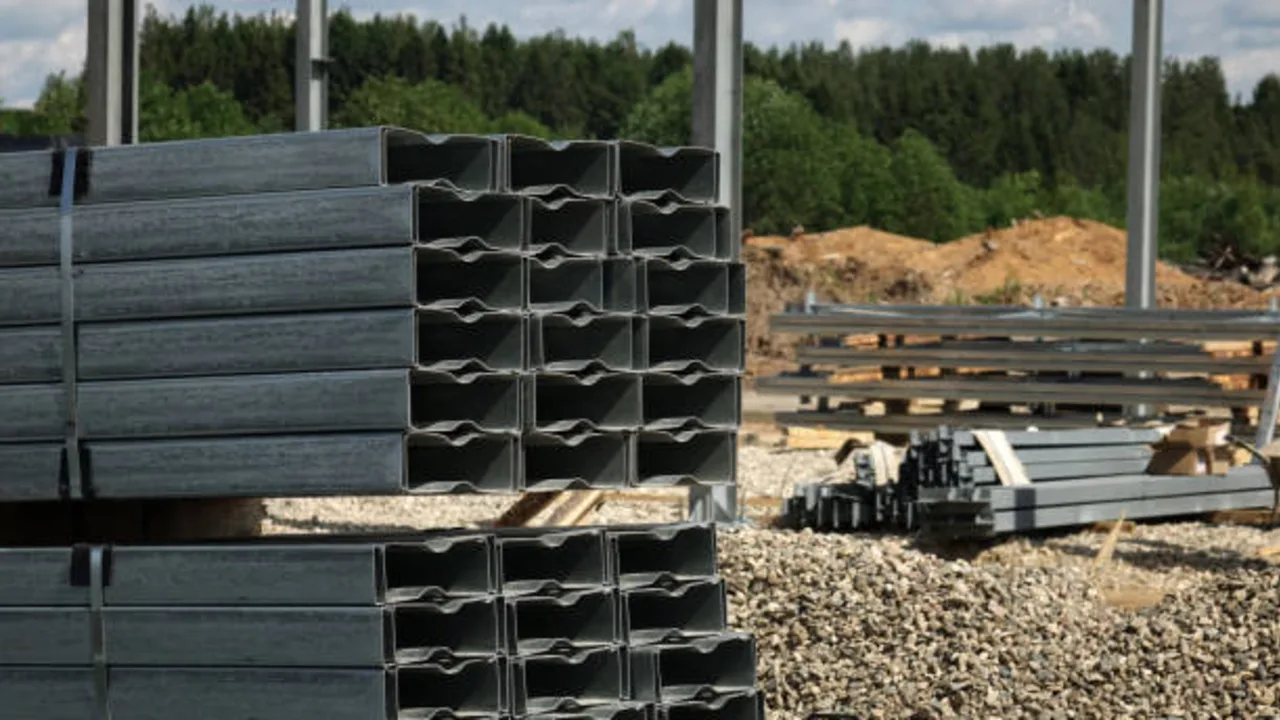
C and Z purlins are cold-formed steel sections used as secondary framing in steel buildings. They are usually roll-formed from steel coils into specific shapes, then cut, punched, marked, and prepared for installation. Although they are lighter than primary steel members, they are essential for supporting roof and wall panels.
In roof systems, purlins run across the main frames or rafters and provide fixing points for roofing sheets. In wall systems, similar members are often called girts, and they support wall cladding between columns or wall frames. Together, they create the structural base for the building envelope.
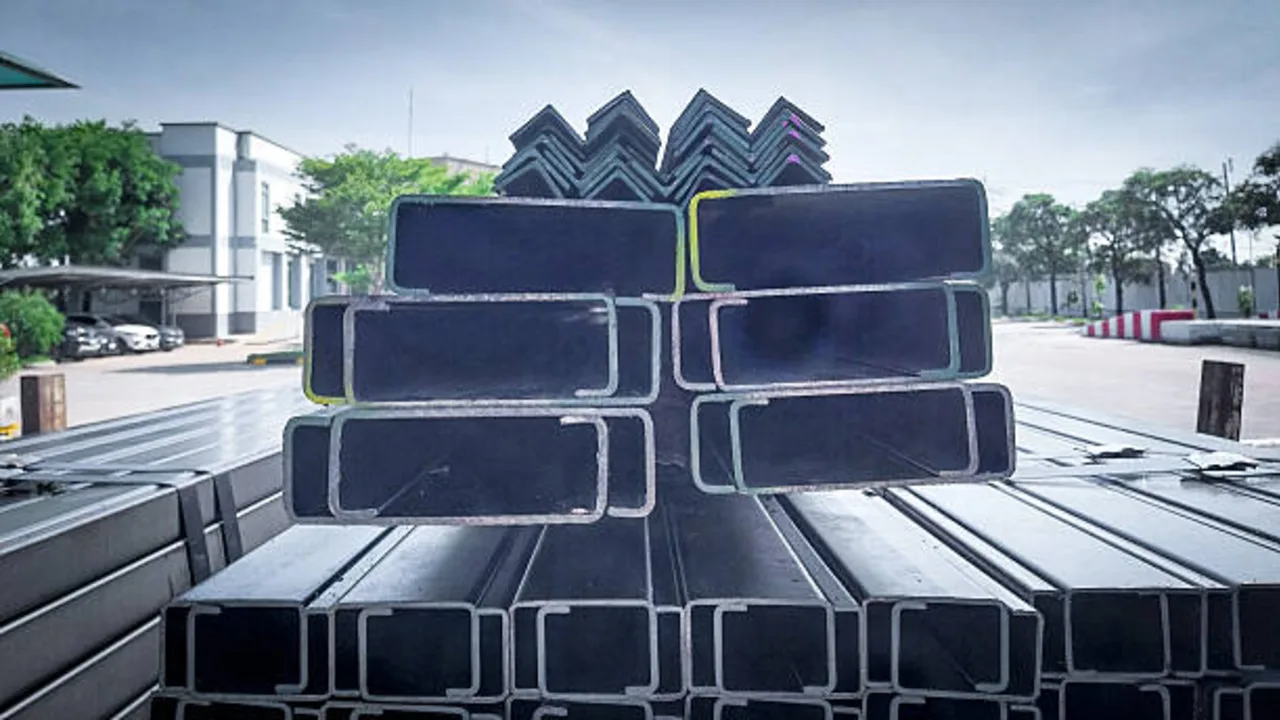
These components are common because they are efficient and practical. They can be manufactured in consistent dimensions, pre-punched for bolted connections, shipped in organized bundles, and installed quickly on site. For projects that need predictable construction speed, this makes them valuable.
Why They Are Called C and Z Purlins
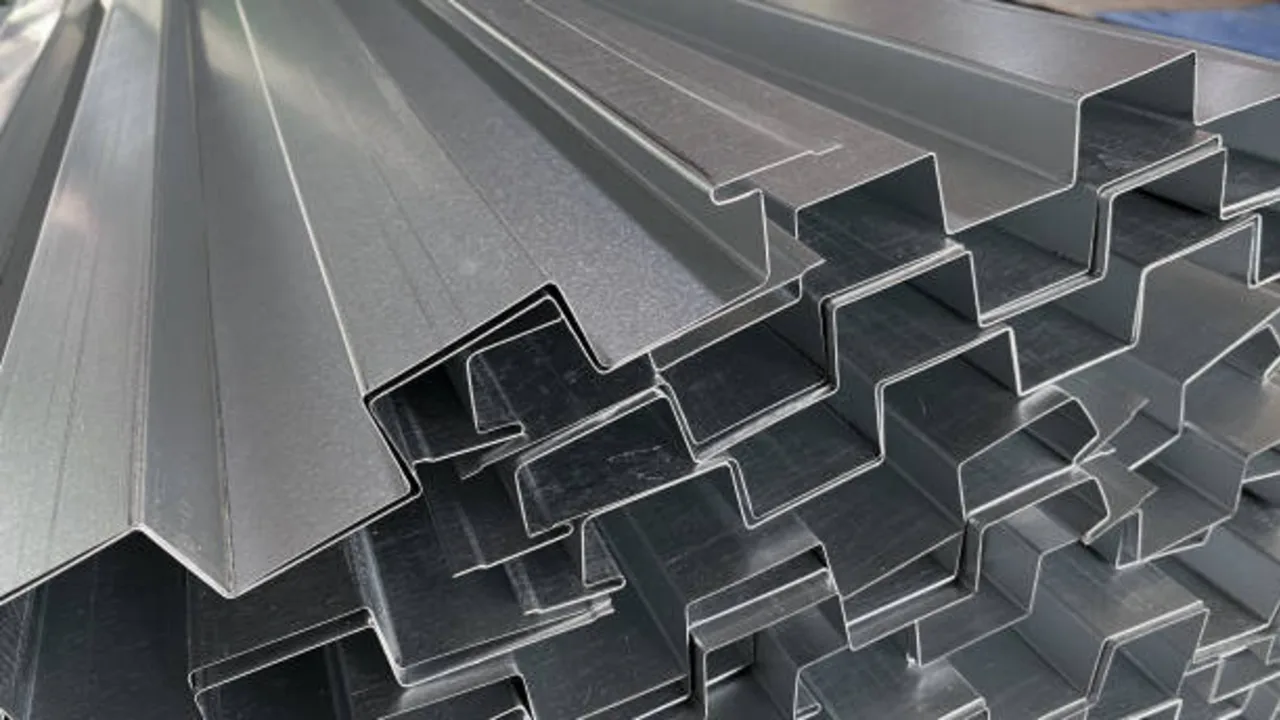
The names come from the cross-sectional shape of each member. A C purlin has a profile that looks similar to the letter C. It normally has a web, two flanges, and lips that increase stiffness. A Z purlin has a profile that looks similar to the letter Z, with flanges facing in opposite directions.
This shape difference affects how each type is used. C sections are often simple to position and are useful in wall framing, end bays, small spans, and locations where members do not need to overlap. Z sections are often used in roof framing because they can be lapped over supports when the design requires continuity across multiple bays.
Both profiles can be made in different depths, thicknesses, hole patterns, and surface finishes. The final selection depends on engineering requirements, panel system, connection details, and installation method.
Where They Sit in a Steel Building
Purlins are installed between the main structural frame and the roof or wall cladding. On a roof, they usually sit on rafters, trusses, or portal frames. On walls, girts are connected to columns, wall posts, or side frames. Their position makes them the link between the building envelope and the primary steel structure.
When roof sheets receive wind uplift, rain load, snow load, or maintenance load, those forces move into the purlins first. The purlins then transfer the forces into the main frame. The same logic applies to wall panels under wind pressure or suction. This makes secondary framing an important part of the load path.
A practical steel building needs good coordination between primary framing, purlins, girts, roof panels, wall panels, fasteners, insulation, gutters, skylights, vents, doors, and other accessories. If one part is selected too late, it can affect many other parts of the project.
Why C and Z Purlins Matter in Roof and Wall Framing
Purlins are sometimes treated as simple support members, but their role is larger than that. They influence the alignment of roof sheets, the strength of cladding support, the ability of the building to resist wind, and the speed of installation. Poor purlin planning can lead to site drilling, panel misalignment, fastening problems, leakage risk, and unnecessary rework.
For steel roof and wall framing, the goal is not only to support panels. The goal is to create a coordinated system where loads transfer clearly, components fit correctly, and installation follows a safe sequence.
Supporting Roof Sheets and Wall Panels
Roof sheets and wall panels need regular support points. Purlins and girts provide those points. Their spacing must match the panel type, panel thickness, fastening method, insulation arrangement, and building load requirements. If spacing is too wide, panels may deflect too much or require stronger sheet profiles.
Good purlin alignment also affects appearance and weather performance. Roof sheets need a straight support line for proper fastening. Wall panels need consistent support to avoid waviness, uneven fixing, and gaps around openings. For buildings with large wall areas, even small alignment issues can become visible after cladding is installed.
This is especially important in industrial buildings where roof and wall systems must perform under wind, heat, rain, dust, and daily operational conditions. A stable purlin layout helps the envelope system work as intended.
Transferring Loads to the Main Frame
Purlins help transfer loads from the roof and wall system into the primary structure. These loads may include dead load, live load, wind pressure, wind uplift, snow load, maintenance load, suspended services, and loads from roof accessories. The load path must be clear from roof sheet to purlin, from purlin to rafter or frame, and from frame to foundation.
Wind uplift is one of the most important conditions for roof purlins. During strong wind, roof panels can experience upward suction. The purlins, fasteners, laps, bracing, and main frame must work together to resist this force. If the purlin system is weak or poorly connected, the roof system may not perform properly.
Wall girts also face wind pressure and suction. Their design must match the height of the building, wall panel system, local wind conditions, and spacing between columns. This is why purlins and girts should be reviewed as part of the full structural and envelope design.
Improving Installation Efficiency
A well-prepared purlin system can make site work faster. Pre-punched holes reduce drilling on site. Clear marks help workers identify each member. Consistent length and hole patterns make alignment easier. Proper packaging allows the installation team to follow the erection sequence without searching through mixed materials.
Installation efficiency is not only about speed. It also affects safety and accuracy. When purlins are installed in the right order, with correct bracing and support, the frame becomes easier to stabilize. When members are misplaced or holes do not match, workers may need temporary adjustments, site drilling, or extra lifting, which can slow the project and increase risk.
For prefabricated steel buildings, this coordination is one of the main advantages. The more work that is solved before materials arrive on site, the smoother the installation becomes.
C Purlins vs Z Purlins: Main Differences
Both C and Z profiles are used in steel buildings, but they are not always interchangeable. The right choice depends on roof layout, wall layout, span arrangement, lapping requirement, connection method, and installation conditions. Understanding the differences helps avoid overdesign, weak support, or difficult site work.
C Purlins
C purlins have a simple and practical shape. They are often used in wall framing, end bays, smaller roof spans, door and window framing, and support conditions where lapping is not required. Their shape makes them easy to position and connect, especially where the member works as a single span.
C sections are also useful for framing around openings, edge conditions, and locations where the installation team needs a straightforward member orientation. In many projects, C purlins and C girts are selected because they are simple, stable, and easy to coordinate with wall panels or secondary framing details.
However, C purlins may not be the best choice for continuous roof spans where overlapping at supports is desired. In those cases, a Z profile may offer better layout flexibility.
Z Purlins
Z purlins are commonly used in roof framing because their shape allows lapping over supports in many designs. When properly engineered, lapped Z purlins can improve continuity across multiple bays and help distribute loads more efficiently than simple single-span members.
This makes Z sections practical for large industrial roofs, warehouses, factories, and long buildings with repeated frame spacing. They can support metal roof sheets while helping the roof system work continuously along the building length.
Z purlins require careful coordination. Lap length, bolt pattern, support position, bracing, and installation direction must follow the design. If lapping is done incorrectly, the expected structural behavior may not be achieved. For this reason, Z purlins should be detailed clearly before fabrication begins.
Quick Comparison Table
| Factor | C Purlins | Z Purlins |
|---|---|---|
| Profile shape | C-shaped section with flanges on the same side | Z-shaped section with flanges facing opposite directions |
| Common use | Wall girts, end bays, small spans, framed openings | Roof purlins, continuous spans, repeated bay systems |
| Span behavior | Often used as single-span members | Often used where continuity over supports is needed |
| Lapping ability | Limited for typical purlin layouts | Can be lapped at supports when designed correctly |
| Installation | Simple orientation and easy positioning | Requires careful direction, lap, and bolt coordination |
| Typical application | Wall framing, edge framing, smaller steel buildings | Industrial roofs, warehouses, factories, long-span layouts |
Common Applications of C and Z Purlins
C and Z Purlins are used across many steel building types because they support both roof and wall systems. Their application depends on the building function, the frame spacing, the envelope system, and the environmental conditions.
Steel Warehouses
Warehouses need efficient roof framing, clear storage space, fast installation, and reliable wall cladding support. Purlins help create a roof system that can support metal sheets, insulation, skylights, ventilation details, and drainage components. Wall girts support cladding around loading areas, door openings, and long wall elevations.
In logistics buildings, installation speed is often important because the building may need to enter service quickly. A well-organized purlin package can help reduce field work and keep the erection process moving.
Factories and Workshops
Factories and workshops often have more complex requirements than simple storage buildings. They may include roof vents, exhaust systems, pipe supports, lighting, suspended services, crane areas, or future equipment changes. Purlin layout must coordinate with these systems so that the roof and wall framing remain practical.
For workshops with heavy use, durability is also important. Purlins may need suitable coating, proper bracing, and clear connection details to handle the operating environment. When roof equipment is added, the load should be reviewed rather than assumed.
Agricultural and Storage Buildings
Agricultural buildings, sheds, storage halls, and equipment shelters often use simple steel framing systems. C and Z purlins are useful here because they offer efficient support for roof and wall sheets without making the structure unnecessarily heavy.
These buildings may face humidity, dust, fertilizer exposure, animal-related moisture, or open-side weather conditions. For that reason, corrosion protection and ventilation should be considered together with purlin selection.
Commercial Steel Buildings
Commercial steel buildings may include showrooms, service centers, retail halls, small offices, and mixed-use facilities. In these projects, wall alignment and clean appearance can be as important as structural support. Girts and purlins help maintain straight cladding lines and support façade elements.
Because commercial buildings may have more openings, doors, windows, signage, and architectural details, secondary framing coordination becomes important early in the project. Late changes can affect purlin spacing, wall girts, panel joints, and support details.
“`html id=”c-and-z-purlins-en-part-2″
Key Design Factors for C and Z Purlins
The performance of C and Z Purlins depends on more than profile shape. Span, spacing, material thickness, steel grade, coating, connection details, roof panel type, and wall panel system all affect the final result. If these factors are not coordinated, the building may still stand, but the roof and wall system can face problems during installation or operation.
Good purlin planning starts with the building function. A logistics warehouse, food storage facility, heavy workshop, agricultural shed, and commercial showroom may all use steel purlins, but they do not always need the same spacing, coating, profile depth, or connection layout. The right decision comes from reviewing the entire steel building system, not from choosing one member in isolation.
Span and Spacing
Span and spacing are two of the most important factors in purlin design. The span is the distance the purlin must bridge between main supports, such as rafters, trusses, or frames. Spacing is the distance between purlins along the roof or wall surface. Together, they affect panel support, structural capacity, deflection, fastening, and roof appearance.
If purlins are spaced too far apart, roof sheets may deflect more than expected, fasteners may experience higher demand, and the roof system may become less stable under wind uplift. If spacing is too close, the system may use unnecessary material and increase installation time. The best layout balances strength, cost, cladding support, and installation efficiency.
Wall girts also need careful spacing. Tall wall panels, strong wind pressure, large openings, and architectural cladding systems may require closer support. For long wall elevations, consistent spacing helps create a cleaner finish and reduces panel waviness.
Load Requirements
Purlins must be selected according to the loads they need to carry. These loads can include roof dead load, roof live load, wind uplift, snow load where relevant, maintenance load, suspended services, and loads from roof-mounted accessories. Wall girts must resist wind pressure, wind suction, and cladding-related loads.
For roof systems, wind uplift deserves special attention. Metal roof panels can experience upward suction during strong wind. The roof sheet, fasteners, purlins, laps, bracing, and primary frame must work together as a load path. This is why engineering guidance for cold-formed steel purlin roof framing systems often treats roof framing as a coordinated system rather than a single isolated member.
Loads should be reviewed before fabrication begins. If roof equipment, suspended pipes, solar panels, ventilation units, or service platforms are added later, the purlin system may need additional checks or reinforcement. Assuming that a standard purlin layout can carry every future load is a common mistake.
Material Thickness and Steel Grade
The thickness and grade of steel affect bending strength, stiffness, buckling resistance, deflection, and connection behavior. A deeper purlin profile may not perform well if the thickness is too low for the span or load condition. A stronger steel grade may improve capacity, but it still needs proper connection design and installation control.
For industrial buildings, material selection should consider both structural demand and practical handling. Very thin members may be easier to lift but more vulnerable to damage during transport, stacking, or installation. Heavier members may provide better strength but can increase cost and handling difficulty.
A balanced specification should match the project’s span, load, roof system, wall system, and environmental exposure. It should also consider fabrication accuracy, hole punching, coating process, and site erection method.
Corrosion Protection
Purlins are often hidden behind roof sheets, wall panels, insulation, or ceiling systems. Because they are not always visible after construction, corrosion protection should be planned early. Galvanized steel is commonly used for purlins and girts, but the required coating level depends on the building environment.
A dry inland warehouse may need a different protection strategy from a coastal building, humid agricultural shed, chemical facility, food processing plant, or open-sided structure. Moisture, salt, industrial fumes, condensation, fertilizers, and cleaning processes can all influence corrosion risk.
Protection should also cover the project delivery process. Purlins can be scratched during transport, loading, unloading, lifting, or site storage. Good packaging, dry storage, correct stacking, and touch-up procedures help protect the coating before the building is closed.
Connection Details
Connection details determine whether the purlin system can be installed smoothly and perform correctly. Important details include bolt size, hole position, cleats, laps, anti-sag rods, bracing, end conditions, and support locations. If hole patterns do not match the frame or cleats, the installation team may need site drilling or modification.
For Z purlins, lap details are especially important. Lap length, bolt spacing, orientation, and support position must follow the design. A lapped Z purlin system can be efficient, but only when the details are clear and the workers install the members in the correct direction.
C purlins also need careful connection planning, especially around framed openings, end walls, wall girts, and edge conditions. The connection should support both structural load transfer and practical assembly.
Installation Considerations for C and Z Purlins
Even a good purlin design can perform poorly if installation is not controlled. Purlins are usually installed after the main frame has been erected and aligned. Their installation should follow the erection sequence so that the structure remains stable and the roof or wall system can be fixed accurately.
Correct Sequencing
The main frames, columns, rafters, or trusses should be positioned and stabilized before purlins are fully installed. Temporary bracing may be needed during erection. Purlins should not be used as a substitute for the main stability system unless the design clearly allows it.
The installation sequence should also match packaging and delivery. If the correct purlin bundle is not available at the right time, workers may need to move materials repeatedly. This increases the chance of damage, delays, and confusion. Clear marking and organized bundles help the site team follow the plan.
Alignment and Level Control
Purlin alignment affects roof sheet installation, wall panel appearance, waterproofing, and fastener performance. If purlins are not level or straight, roof sheets may not sit correctly. This can create gaps, uneven overlap, fastening difficulty, or visible distortion.
Wall girts also need alignment control. Poorly aligned girts can make wall panels appear wavy, especially on long building elevations. Around doors, windows, louvers, and large wall openings, accurate alignment is even more important because the panels must meet accessories and flashing details.
Checking alignment before cladding begins is easier than correcting problems after panels are installed. This is why inspection during secondary framing installation is important.
Handling and Storage
C and Z purlins are lighter than primary steel members, but they still need proper handling. Long thin members can bend, twist, or suffer coating damage if they are lifted incorrectly. During transport and storage, they should be stacked in a stable way and protected from standing water, mud, and impact.
Site storage should keep purlins off the ground where possible. If bundles are stored outdoors for long periods, water trapped between members can cause staining or corrosion risk. Protective packaging should be managed carefully so that moisture is not sealed inside.
Good handling protects not only the appearance of the purlins but also their installation accuracy. Bent or damaged members can create alignment problems and slow down the work.
Coordination with Roof and Wall Systems
Purlins and girts must coordinate with roof sheets, wall panels, insulation, skylights, roof vents, gutters, downpipes, doors, windows, louvers, and other accessories. If these systems are selected after the purlin layout is fixed, changes may be required.
For example, a skylight may need extra framing. A large roof vent may require local support. A wider door opening may change wall girt layout. A thicker insulation system may affect fastener length or panel fixing. These details should be reviewed before fabrication so that site work remains simple.
The most efficient projects connect purlin design with cladding design early. This reduces rework and helps the roof and wall system perform as one coordinated envelope.
Common Mistakes When Using C and Z Purlins
Many purlin problems come from treating secondary steel framing as a minor item. In reality, purlins and girts affect structure, envelope, installation, appearance, and maintenance. Avoiding common mistakes can improve both project delivery and long-term building performance.
Choosing by Price Only
The lowest purlin price is not always the lowest project cost. A cheaper member may have insufficient thickness, weak coating, poor hole accuracy, unsuitable length, or inadequate packaging. These issues can create extra work during installation and increase future maintenance risk.
A good purlin choice should consider total project performance. Material cost matters, but so do fabrication accuracy, coating quality, span capacity, connection details, delivery sequence, and compatibility with the roof or wall system.
Ignoring Wind Uplift
Wind uplift can be a serious design condition for roof systems. If purlins, fasteners, laps, and bracing are not designed correctly, the roof may not resist uplift forces as expected. This is especially important in open terrain, coastal areas, high-wind regions, and buildings with large roof areas.
Wind design should not focus only on the roof sheet. The complete load path must be checked from panel to purlin, from purlin to main frame, and from frame to foundation. Connections are just as important as member strength.
Poor Hole Coordination
Pre-punched holes are one of the advantages of prefabricated steel purlins. But if hole positions are wrong, the advantage disappears. Incorrect holes can lead to site drilling, misalignment, delayed installation, and weakened confidence in the fabrication package.
Hole coordination should be checked against cleats, frame drawings, lap details, bracing locations, and wall opening details. Good shop drawings and clear approval procedures reduce this risk.
Selecting Roof Panels Too Late
Purlin spacing depends partly on the roof panel system. Different roof sheets have different allowable spans, fastening requirements, overlap details, and deflection behavior. If roof panels are selected too late, the purlin layout may need revision.
The same issue applies to wall panels. Panel profile, thickness, insulation, fastening pattern, and wind pressure all influence girt spacing. Roof and wall systems should be coordinated with secondary framing before fabrication.
Weak Corrosion Planning
Corrosion protection should match the building environment. Using the same coating for every project can create problems in coastal, humid, chemical, or agricultural environments. If the purlins are hidden after installation, corrosion may not be noticed until maintenance becomes more difficult.
A strong corrosion plan considers material coating, transport protection, site storage, drainage, ventilation, condensation, and maintenance access. This is especially important for buildings that operate in wet or aggressive environments.
How to Choose the Right C and Z Purlins for a Steel Building
Choosing the right purlin system means matching engineering needs with project conditions. The decision should consider the building function, span, load, roof panel type, wall panel type, environment, connection method, and installation plan. The best purlin system is not always the heaviest or the cheapest. It is the one that fits the full building system.
Match the Purlin Type to the Building Function
A warehouse may need efficient roof support and fast installation. A factory may need coordination with vents, services, and equipment. An agricultural building may need stronger corrosion planning. A commercial building may need better wall alignment and more accessory coordination.
These differences affect whether C sections, Z sections, or a combination of both should be used. Many projects use Z purlins for roof framing and C girts for wall framing or framed openings. The final decision should follow structural design and project requirements.
Review Span, Load, and Cladding Together
Purlins should not be selected separately from the roof and wall system. Span, load, panel type, fastener system, insulation, wind condition, and frame spacing all work together. Changing one item can affect the others.
For example, increasing frame spacing may require deeper or thicker purlins. Changing the roof sheet may require closer purlin spacing. Adding roof equipment may require local reinforcement. A good review process checks these relationships before fabrication starts.
Plan Fabrication and Installation Together
The best results come when design, fabrication, transport, and installation are planned as one process. For C and Z Purlins for Steel Buildings, this means confirming profile type, thickness, coating, hole punching, marks, bundle sequence, delivery plan, site access, lifting method, and erection sequence early.
This approach helps reduce site drilling, wrong member placement, coating damage, and installation delays. It also makes quality control easier because the project team knows what each member should do and where it should be installed.
Conclusion: C and Z Purlins Are Small Members with Big Structural Importance
C and Z Purlins are essential parts of steel roof and wall framing. They support cladding, transfer loads, improve installation speed, and help the building envelope perform correctly. Although they are secondary members, their influence on the roof and wall system is significant.
C purlins are practical for many wall framing, edge framing, and single-span conditions. Z purlins are widely used for roof framing, especially where continuous spans and lapped supports are useful. Both profiles can perform well when their size, thickness, spacing, coating, and connections are matched to the project.
A reliable steel building needs more than a strong main frame. It also needs coordinated secondary framing. When purlins are designed, fabricated, delivered, and installed as part of the full building system, they help create a roof and wall structure that is stronger, cleaner, faster to build, and easier to maintain over the long term.